In this first proper installment in the series, we will be installing Proxmox on our server and creating our first virtual machine.
But first, let’s discuss some concepts.
What is a virtual machine
A virtual machine (VM) is an entirely software-based emulation of computer hardware. For all intents and purposes, a virtual machine behaves identically to a physical computer, but comes with several key benefits:
- Virtual machines are more easily managed than physical machines. They can be created, destroyed, copied and edited with the click of a button, or represented in code with Infrastructure as Code
- Virtual machines allow for more efficient allocation of compute resources. If you have several servers each which need 8 GBs of RAM, it is often less expensive to purchase a single piece of physical hardware, and divide the resources using virtual machine than to buy several low powered servers
- Virtual machines facilitate running multiple operating systems on physical piece of hardware. Each virtual machine runs its own copy of an operating system, which means that Windows and Linux servers can share the same hardware
What is a hypervisor
A hypervisor is a piece of software that manages virtual machines. It allocates resources to each of the virtual machines and provides a method for the user to manage those VMs. There are two types of hypervisors:
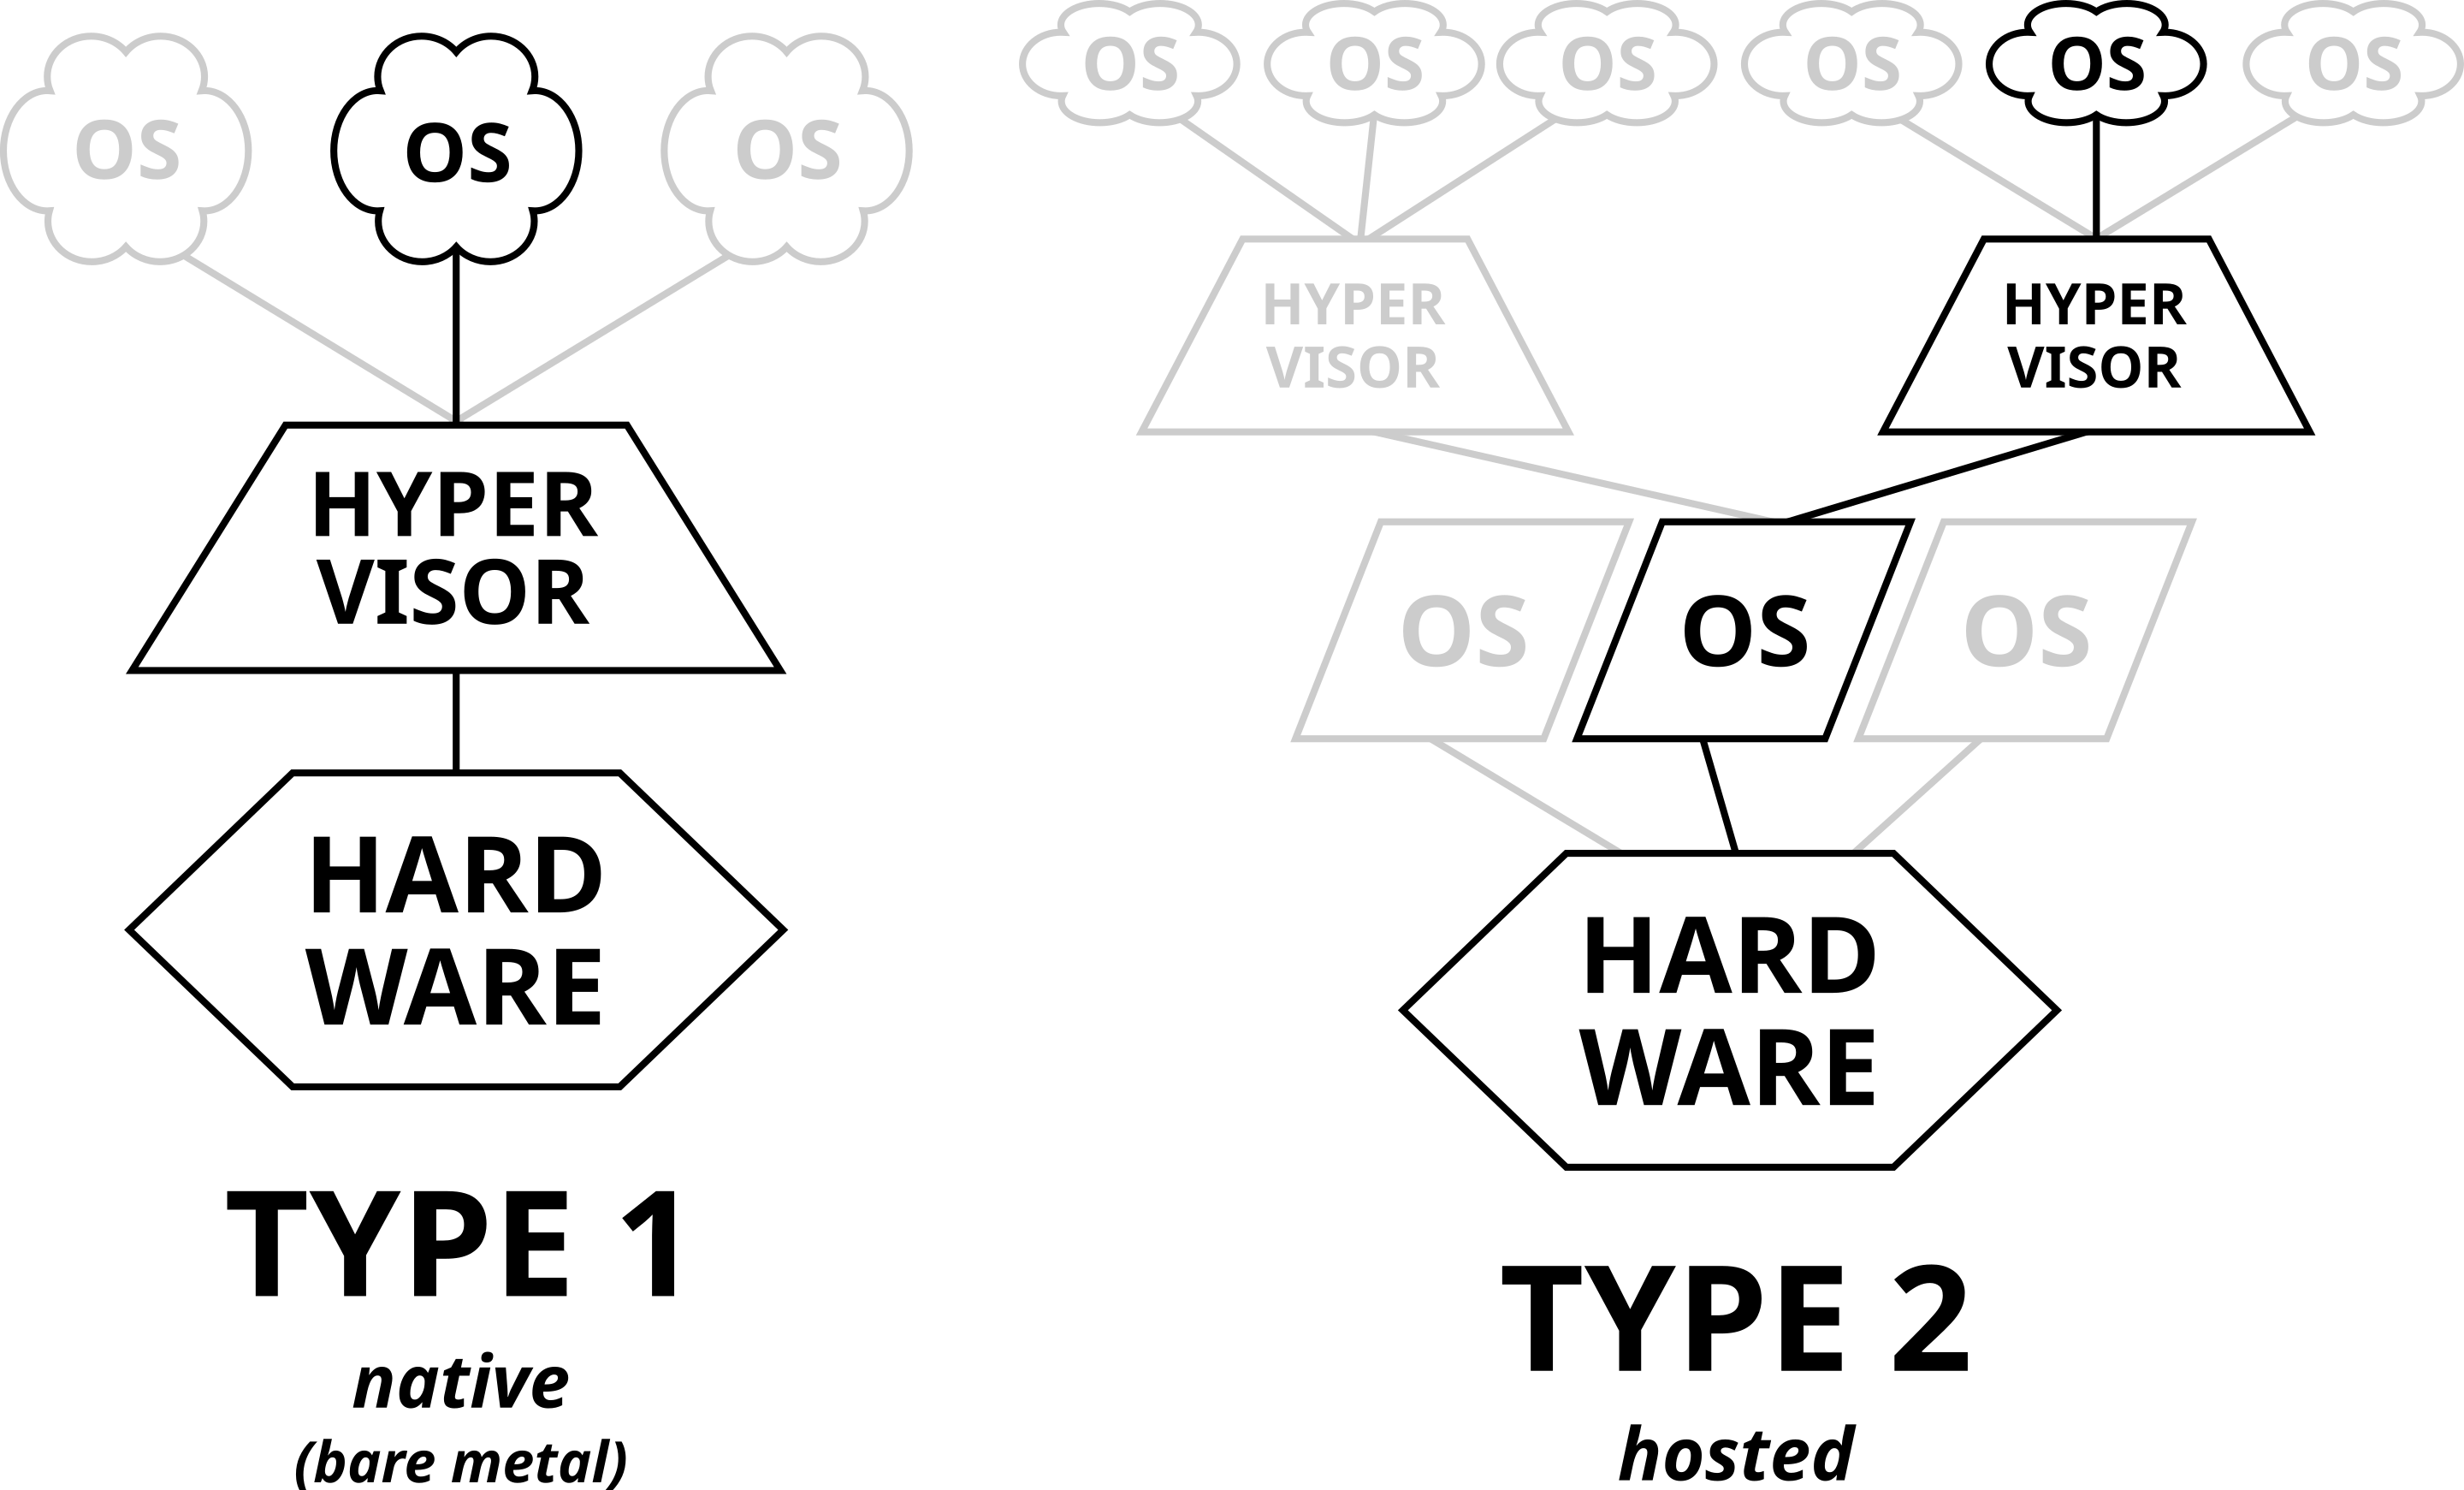
- Type 1 hypervisors run directly atop the physical hardware and are directly able to interact with it, offering more efficiency than a Type 2 hypervisor. They are most often seen in enterprise data centers and cloud environments. Common examples include VMWare’s ESXi, Proxmox Microsoft’s Hyper-V.
- Type 2 hypervisors run atop a host operating system, which in turn interfaces with the physical hardware. Because of this, there is a performance penalty, as the hypervisor is not able to directly manage the hardware itself. Common examples include Oracle Virtualbox, Parallels Desktop, and VMWare Workstation.
Why Proxmox?
We’ll be using this series because it is free and open source. Proxmox has been embraced by both the homelab and datacenter communities and is both easy to use and robust in features. Alternatives do exist in this space, most notably XCP-NG, and would fulfil a similar function with comparable features, however for this tutorial series we’ll be sticking with Proxmox.
Installing Proxmox
Preparing Installation Media
Because Proxmox is a type 1 hypervisor, we’ll be installing it bare metal, not atop of another existing operating system. If you’ve ever installed an operating system like Windows or Linux before, this process will feel familiar. If not, that’s okay too!
You’ll need an empty flash drive, even an 8GB drive is enough. Note that this drive must be empty, as all data on it will be erased. You’ll also need the Proxmox Installation media, which you can find on their website. Select the latest version of Proxmox VE (Virtual Environment) and download it.
Once you have the .iso file downloaded, you’ll need to burn it to the flash drive to make the flash drive bootable, and in turn able to be used to install Proxmox. I personally like Balena Etcher for this, but other options are available.
When you open Etcher, first select “Flash from file” and then select the .iso file you downloaded from Proxmox.
Next, click “Select Target” and select the flash drive you wish to flash to. Finally click “Flash” and wait for the process to complete.
Once Etcher has completed burning the file to the flash drive, you are ready to install Proxmox onto your server!
Installing Proxmox
Next comes the actual fun part! First, plug the flash drive you just burnt with the installation media into your server. When you power on your system, access the one-time boot menu. How you do this will vary depending on your system manufacturer; often it is as simple as mashing the escape or one of the function keys (most often F1, F11 or F12) until a menu to select which device to boot from appears on your screen.
Once you’ve booted to your Proxmox installation media, you will see a screen like this:
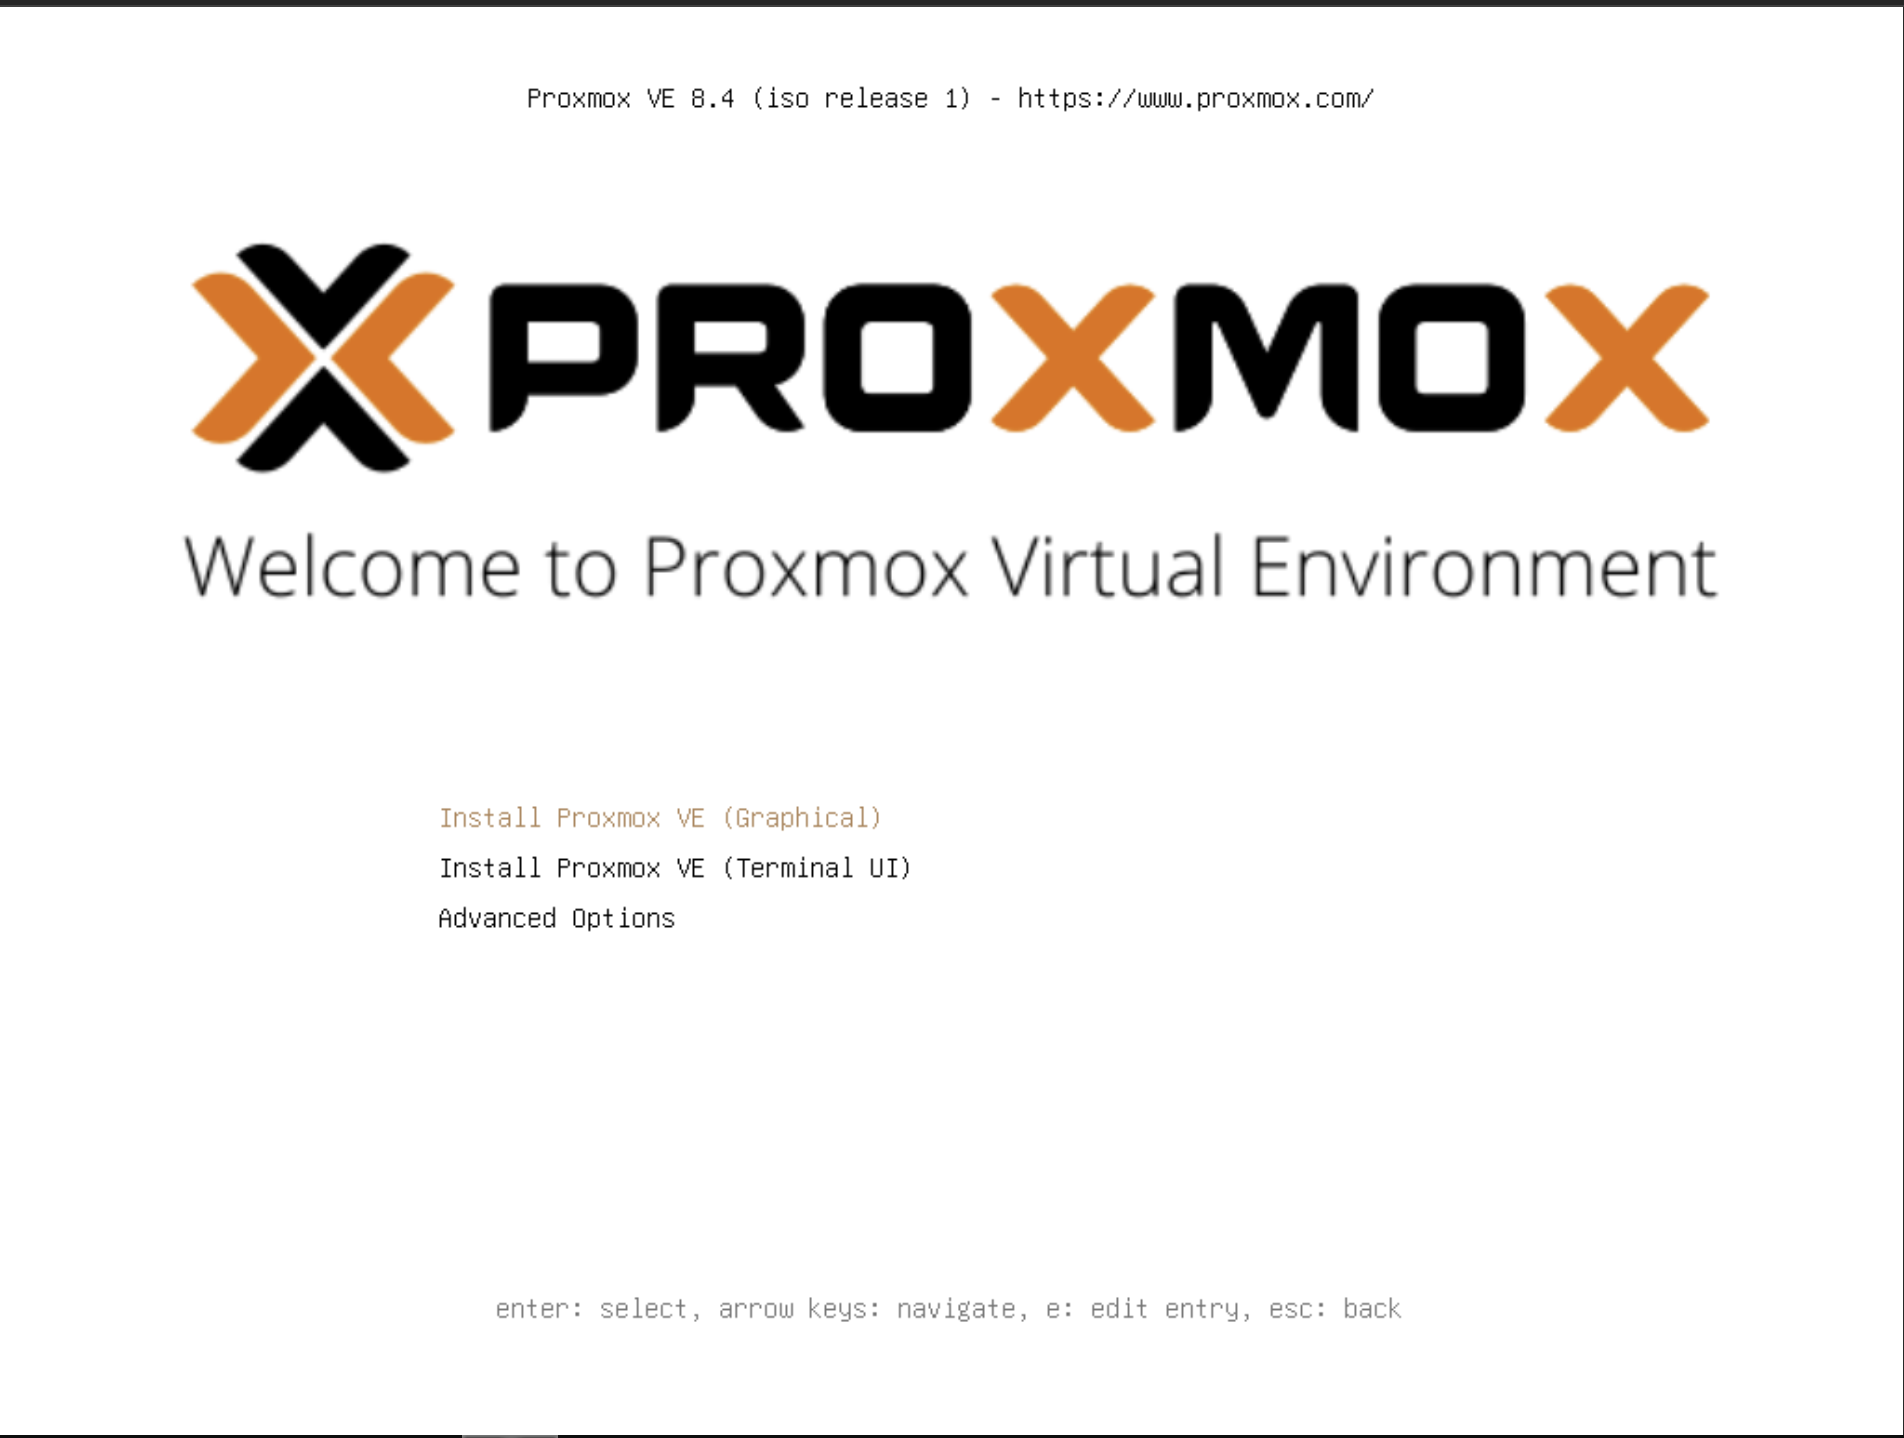
Select “Install Proxmox VE (Graphical)” with the enter key.
On the next screen, accept the EULA.
On the following screen, select the hard drive you’d like to install Proxmox on:
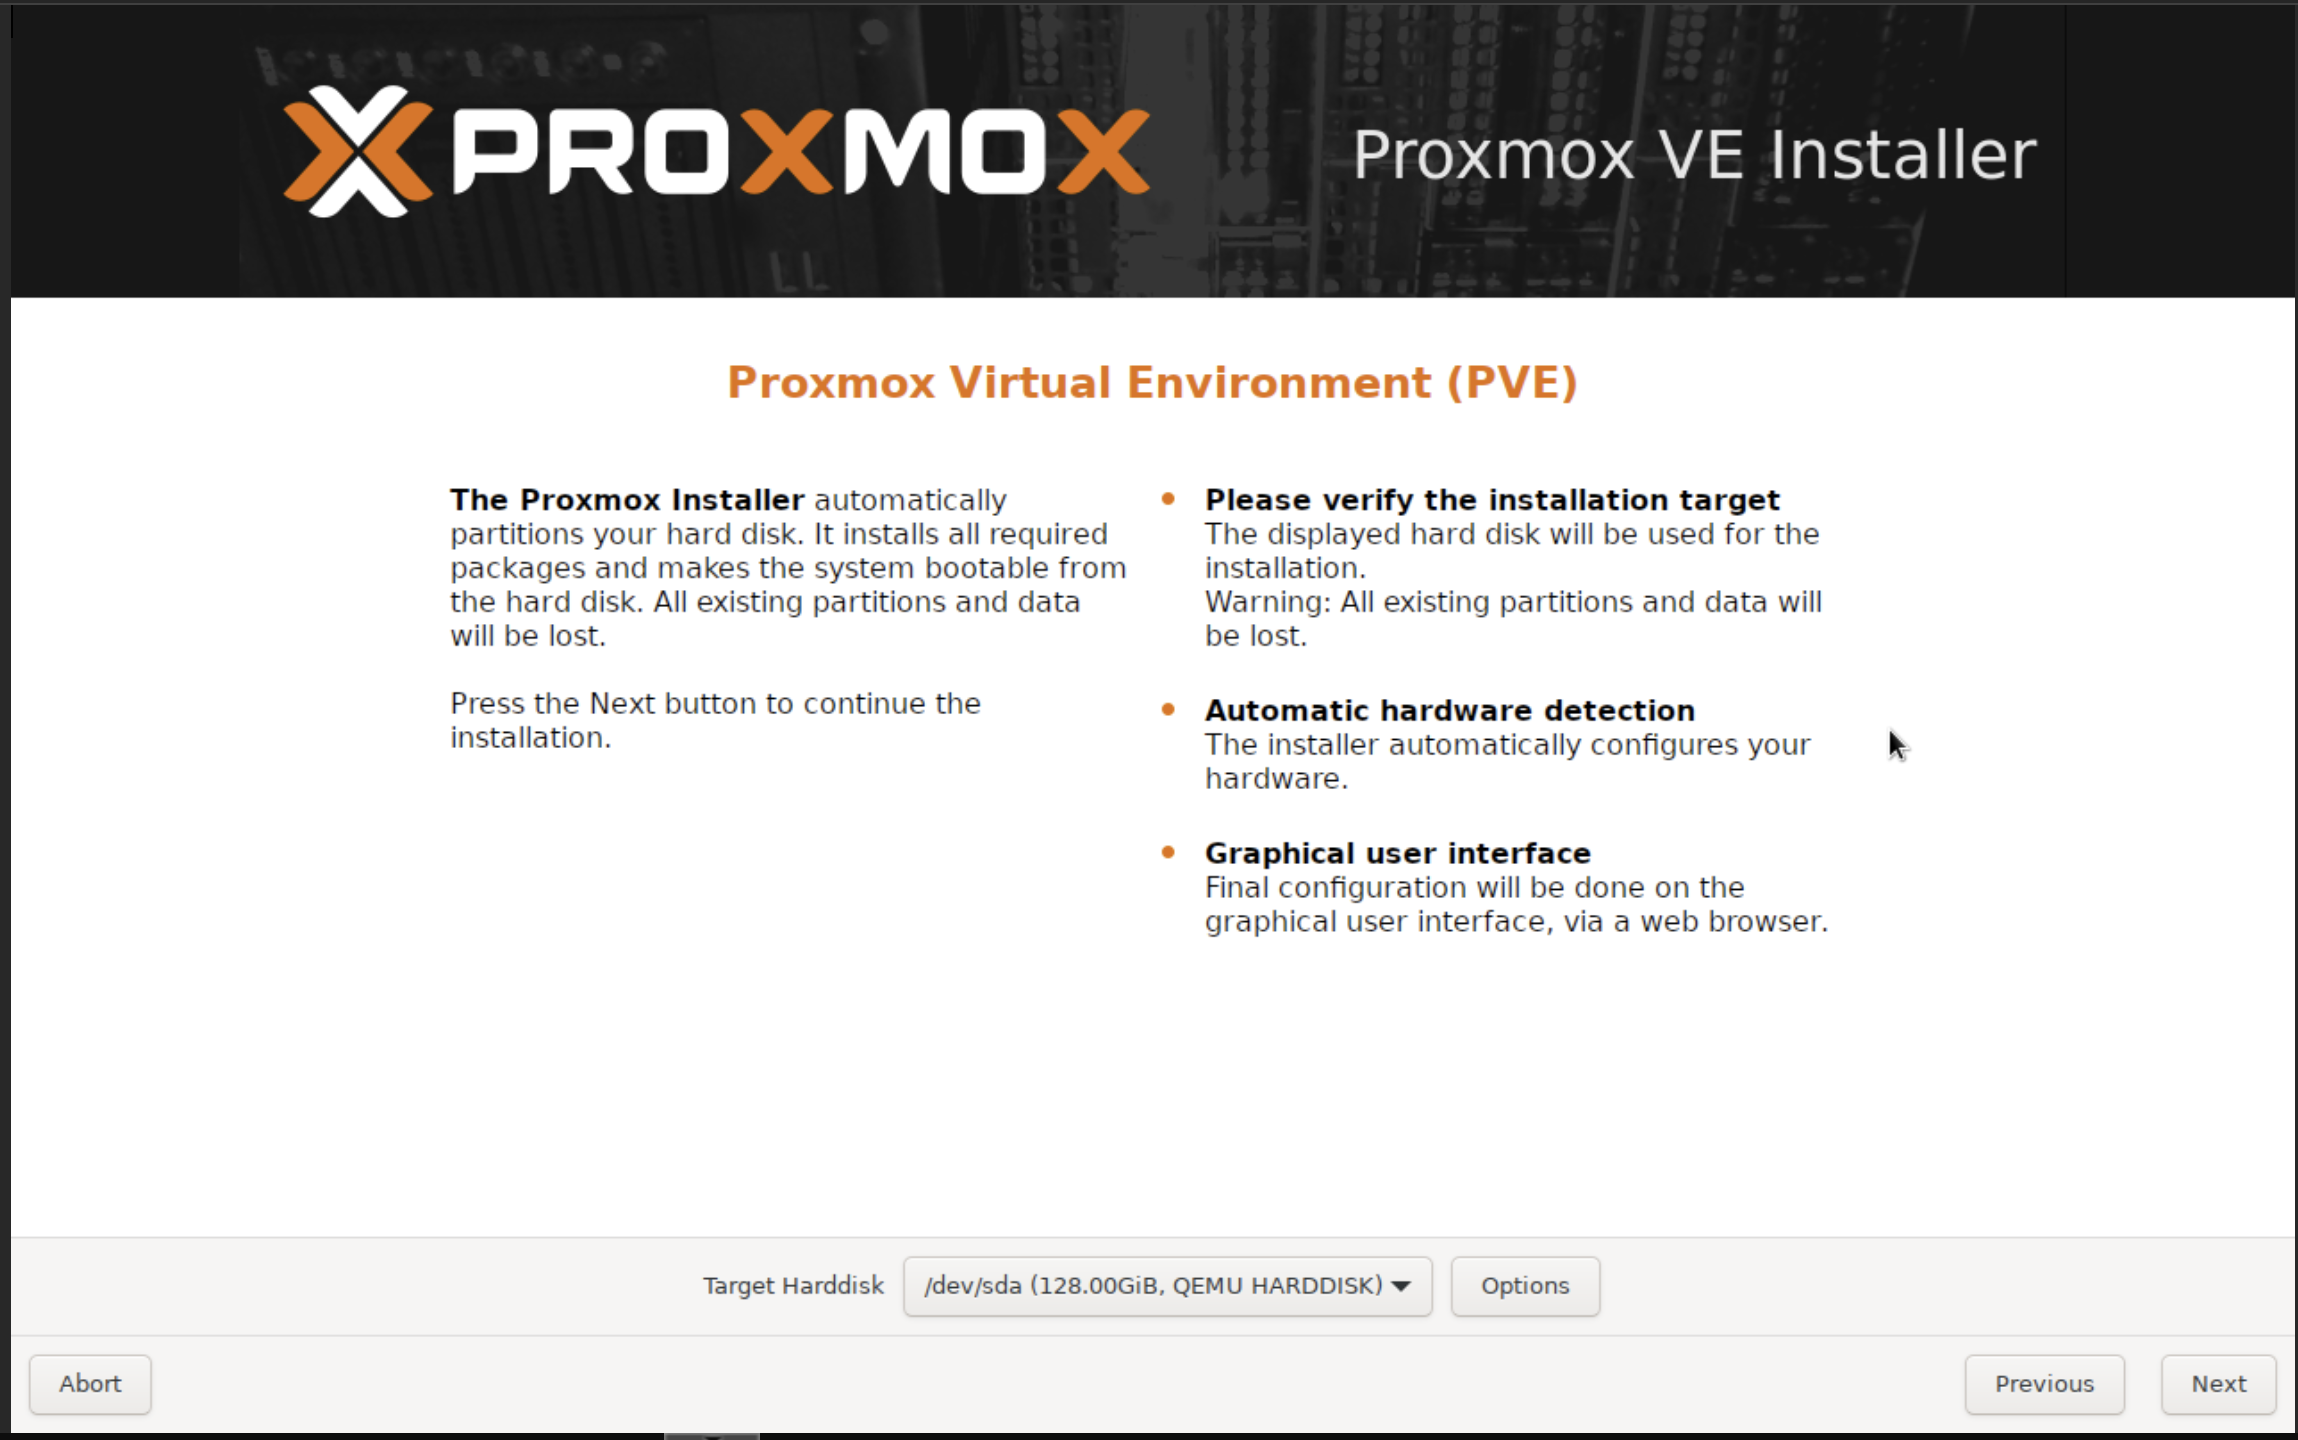
Depending on your system, you may see one or multiple hard drives listed here. Proxmox will automatically handle the partitioning of whatever drive you select (or if you wish to customize the partitioning you can select “Options”, but that is beyond the scope of this guide).
Ensure that you have no data on whichever drive you select, as it will be erased once we confirm all the installation settings.
Once you’ve selected your drive, proceed to the next screen:
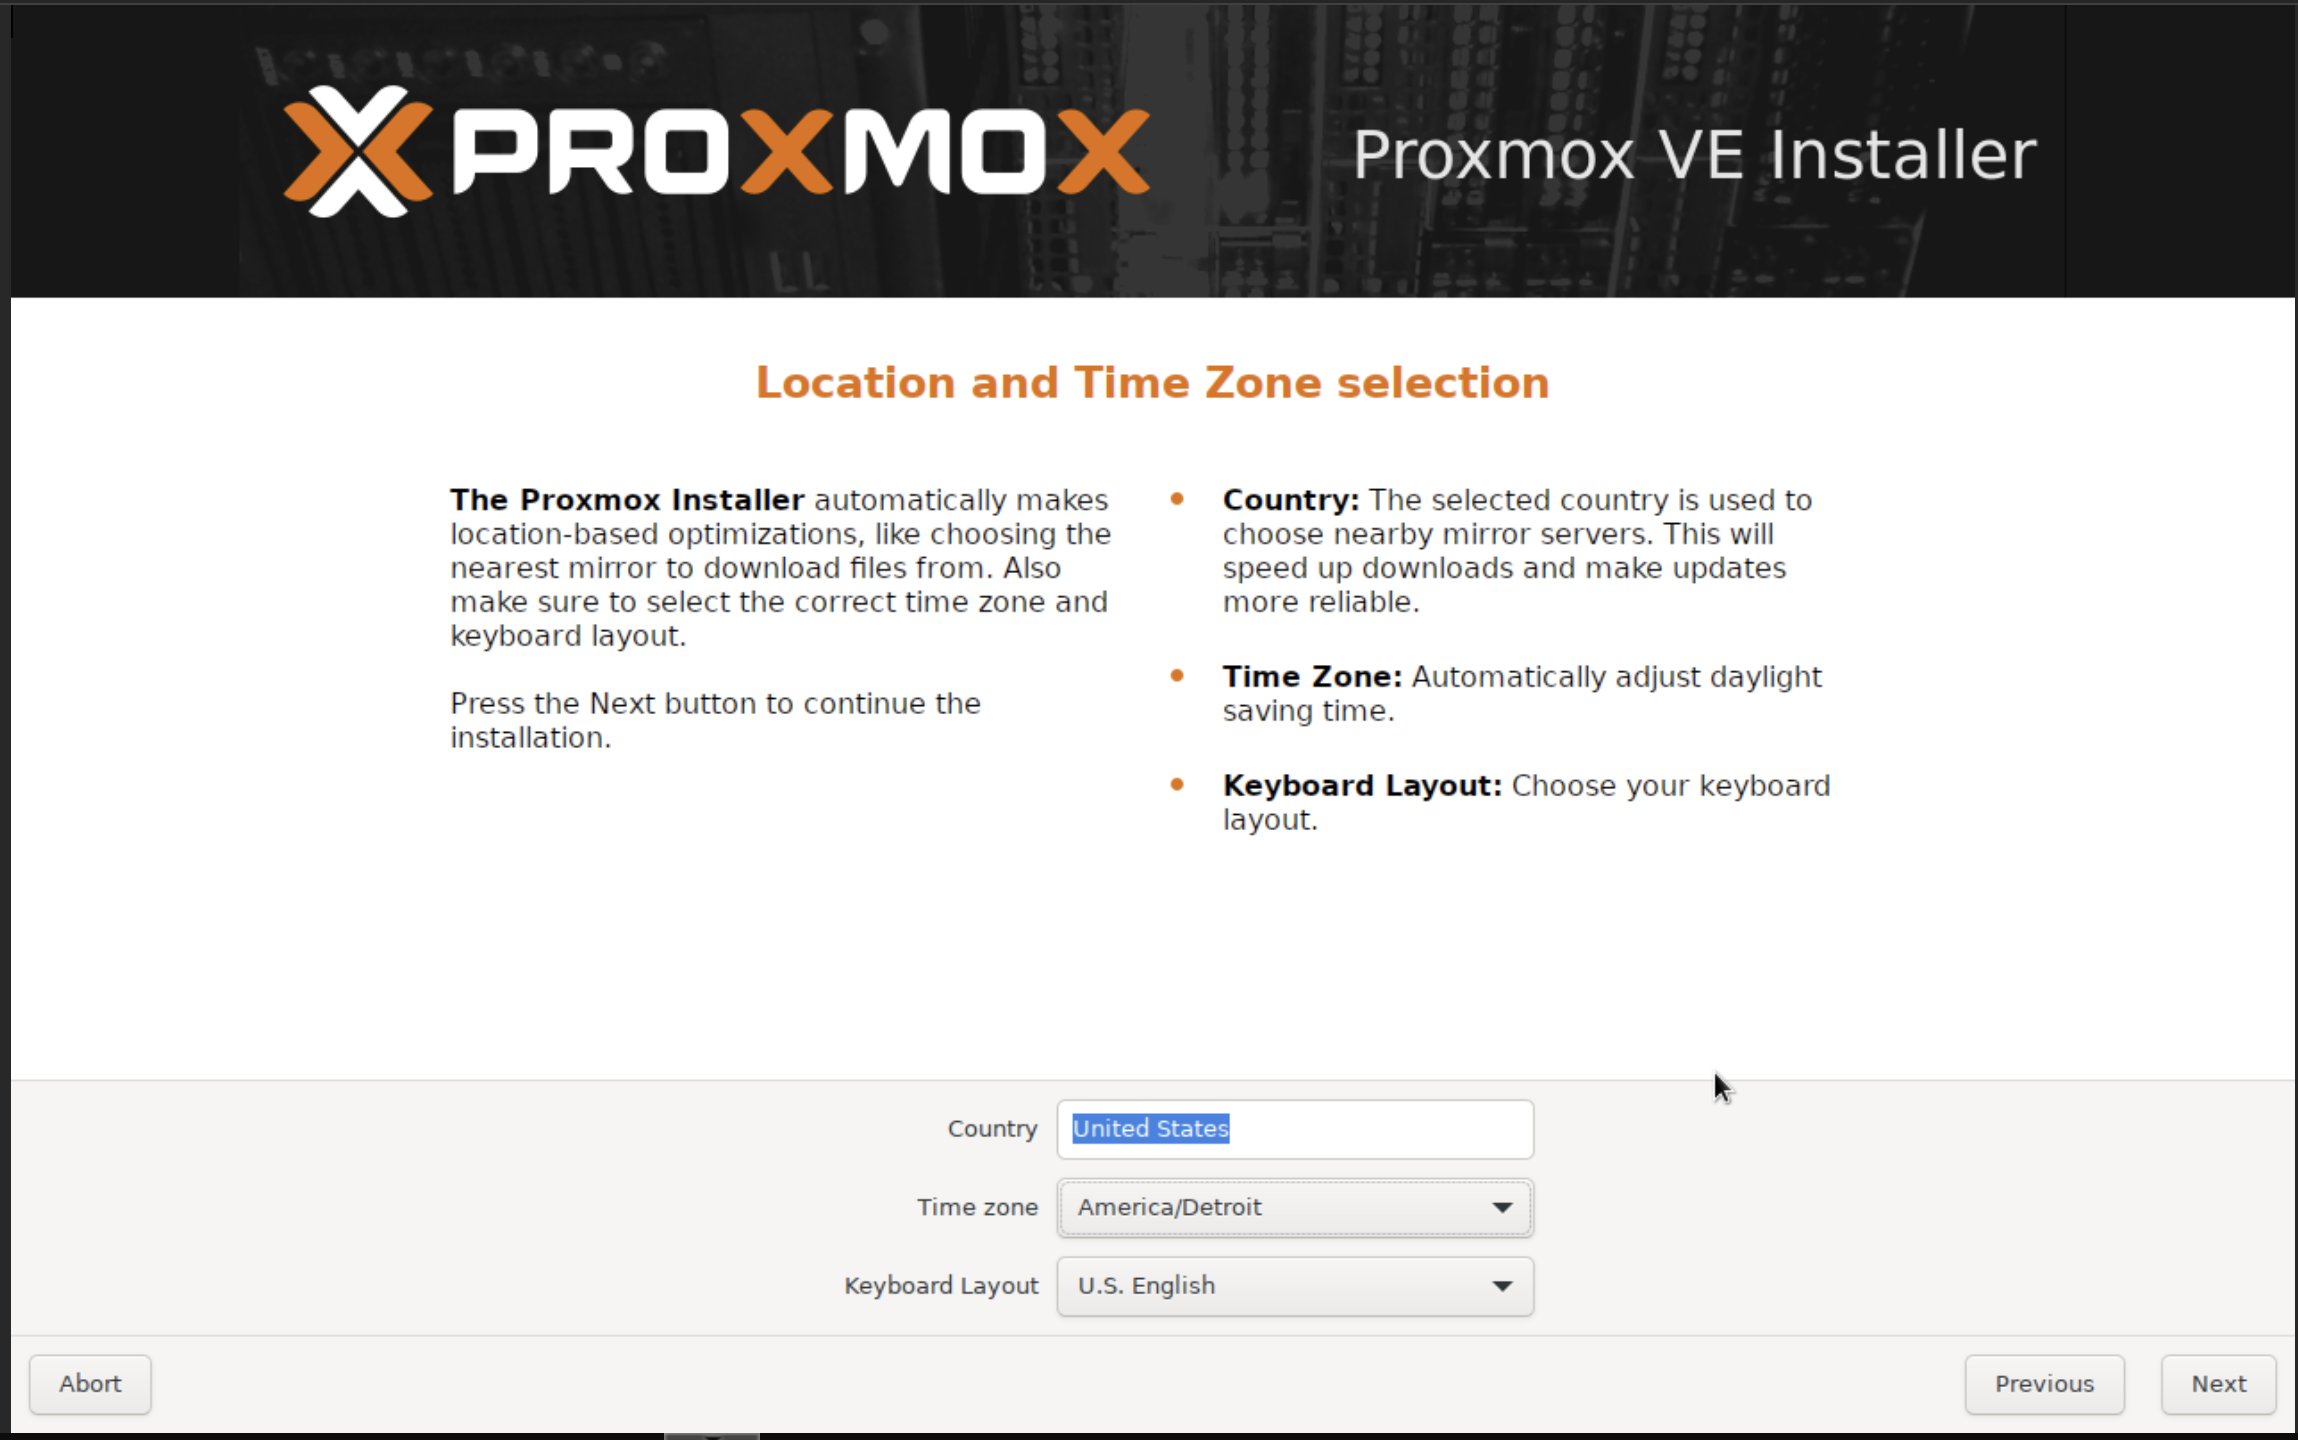
On this screen, enter your country, time zone, and select your keyboard layout before proceeding to the next screen.
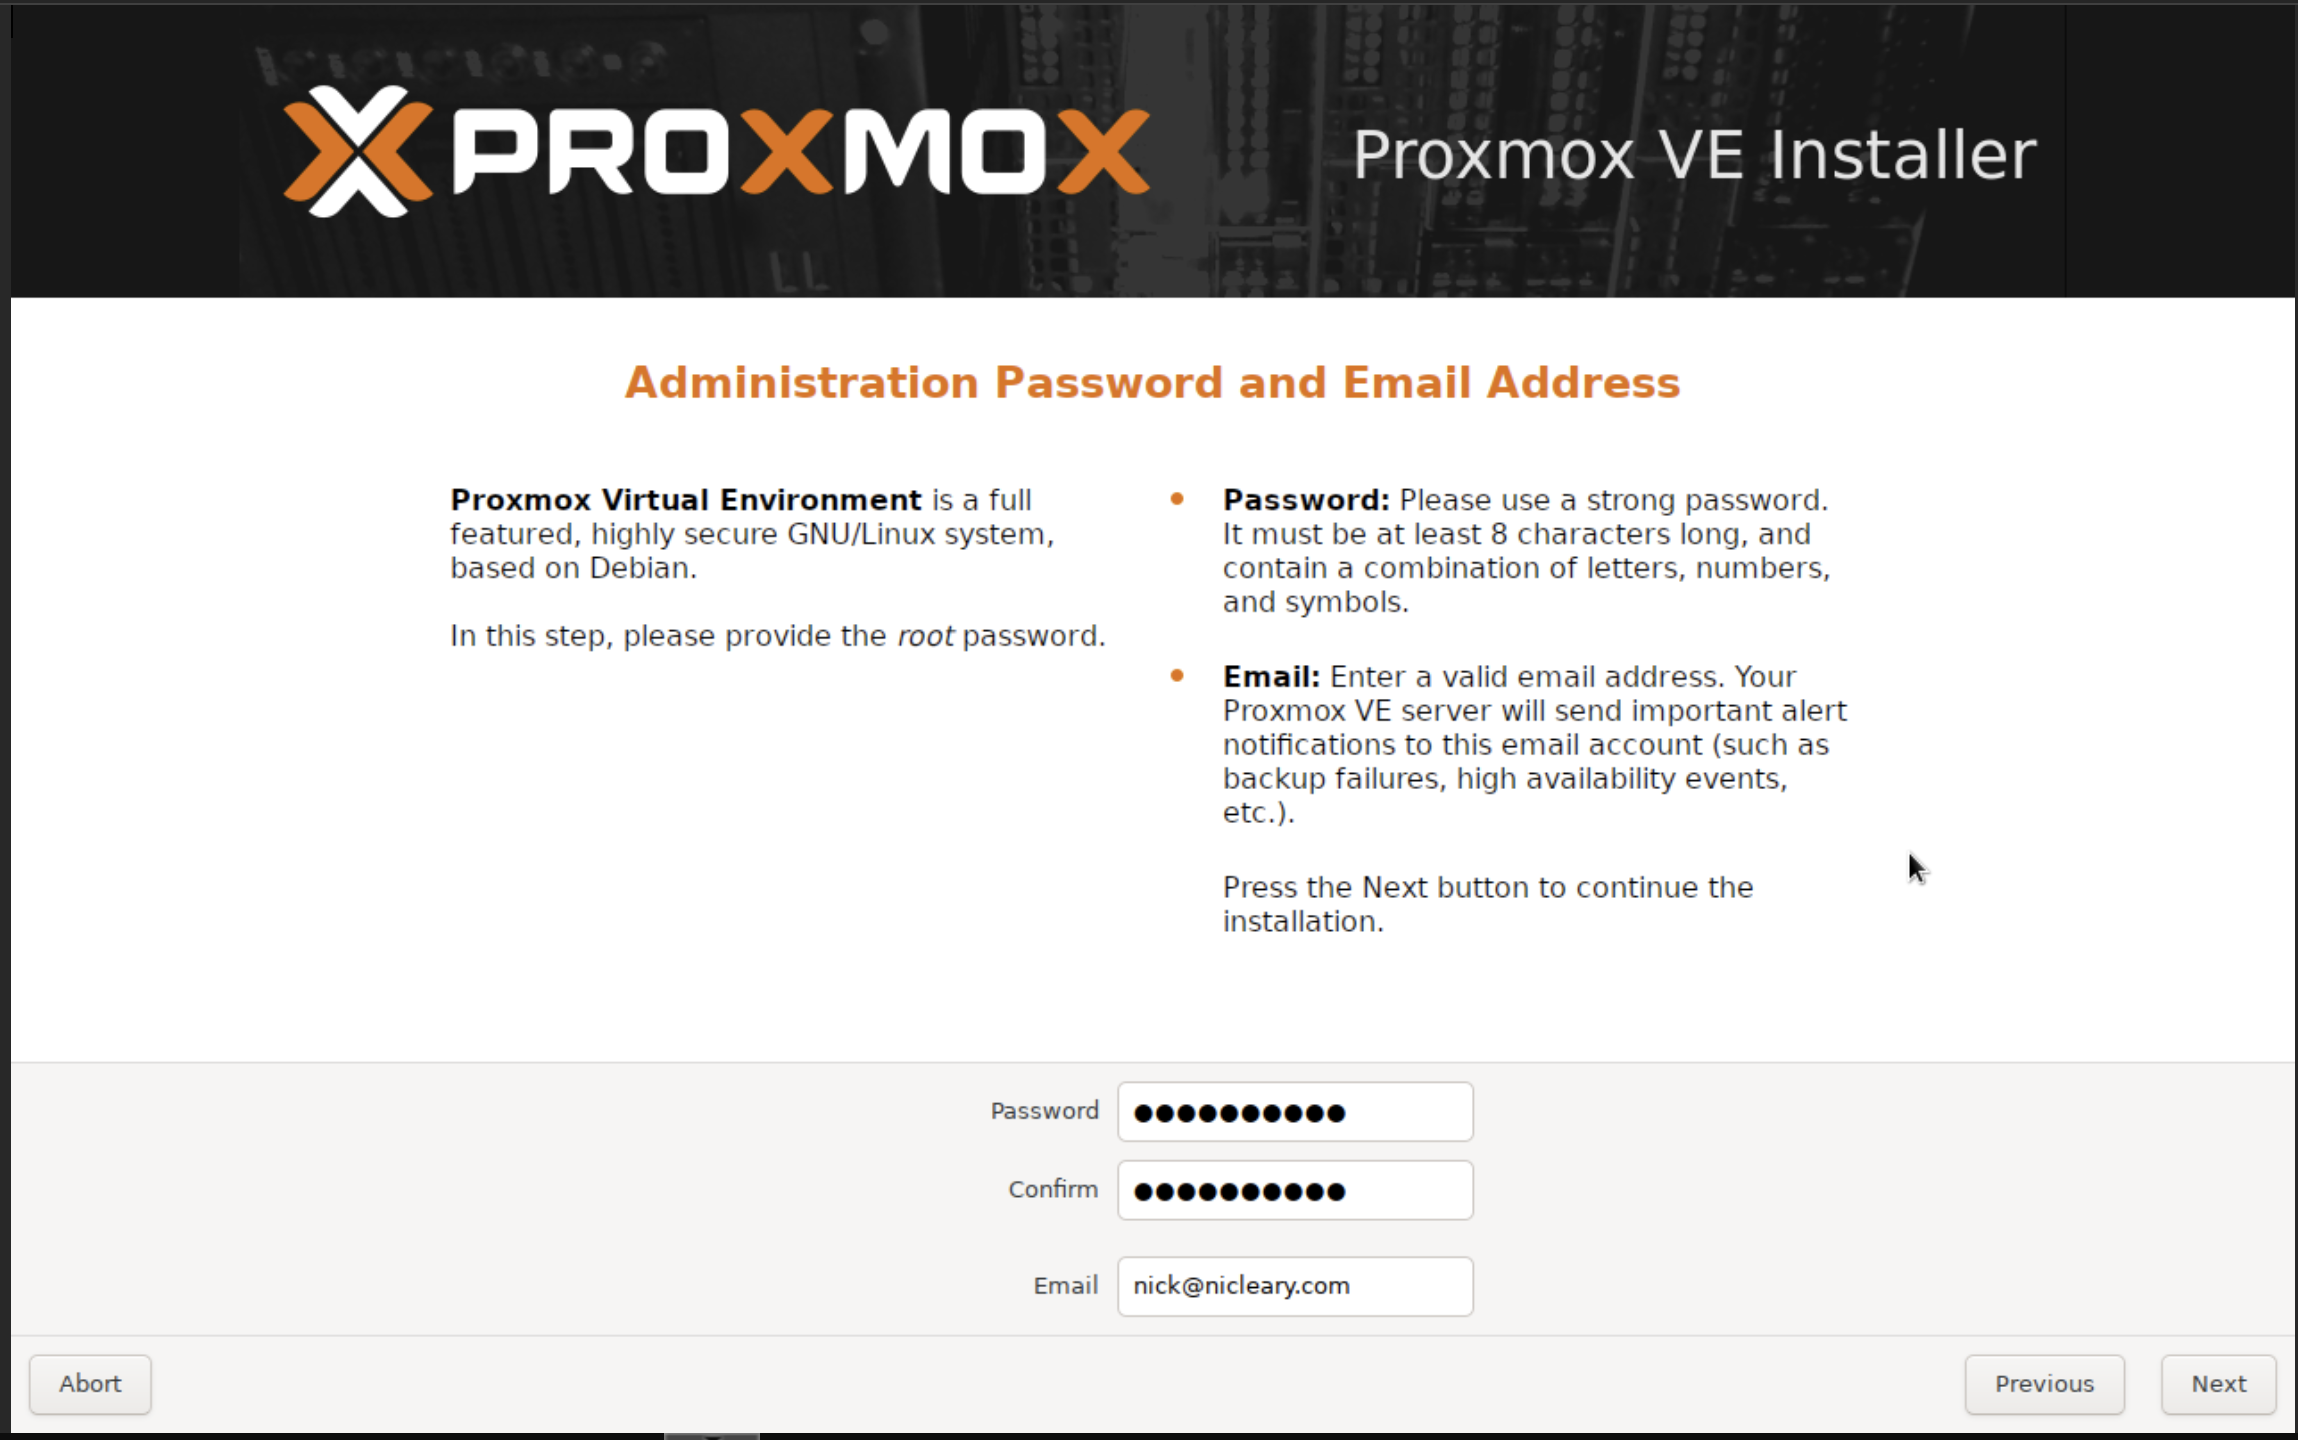
On this next screen, enter what you would like to become the administrative password on this server. Ensure that this is a password you will remember and don’t forget it, otherwise you will not be able to access the system!
Additionally, specify a valid email address where you would like alerts to be sent about this server. Out of the box, Proxmox won’t be able to send these, but we’ll configure these alerts later in the series.
Once this is done, proceed to the next screen.
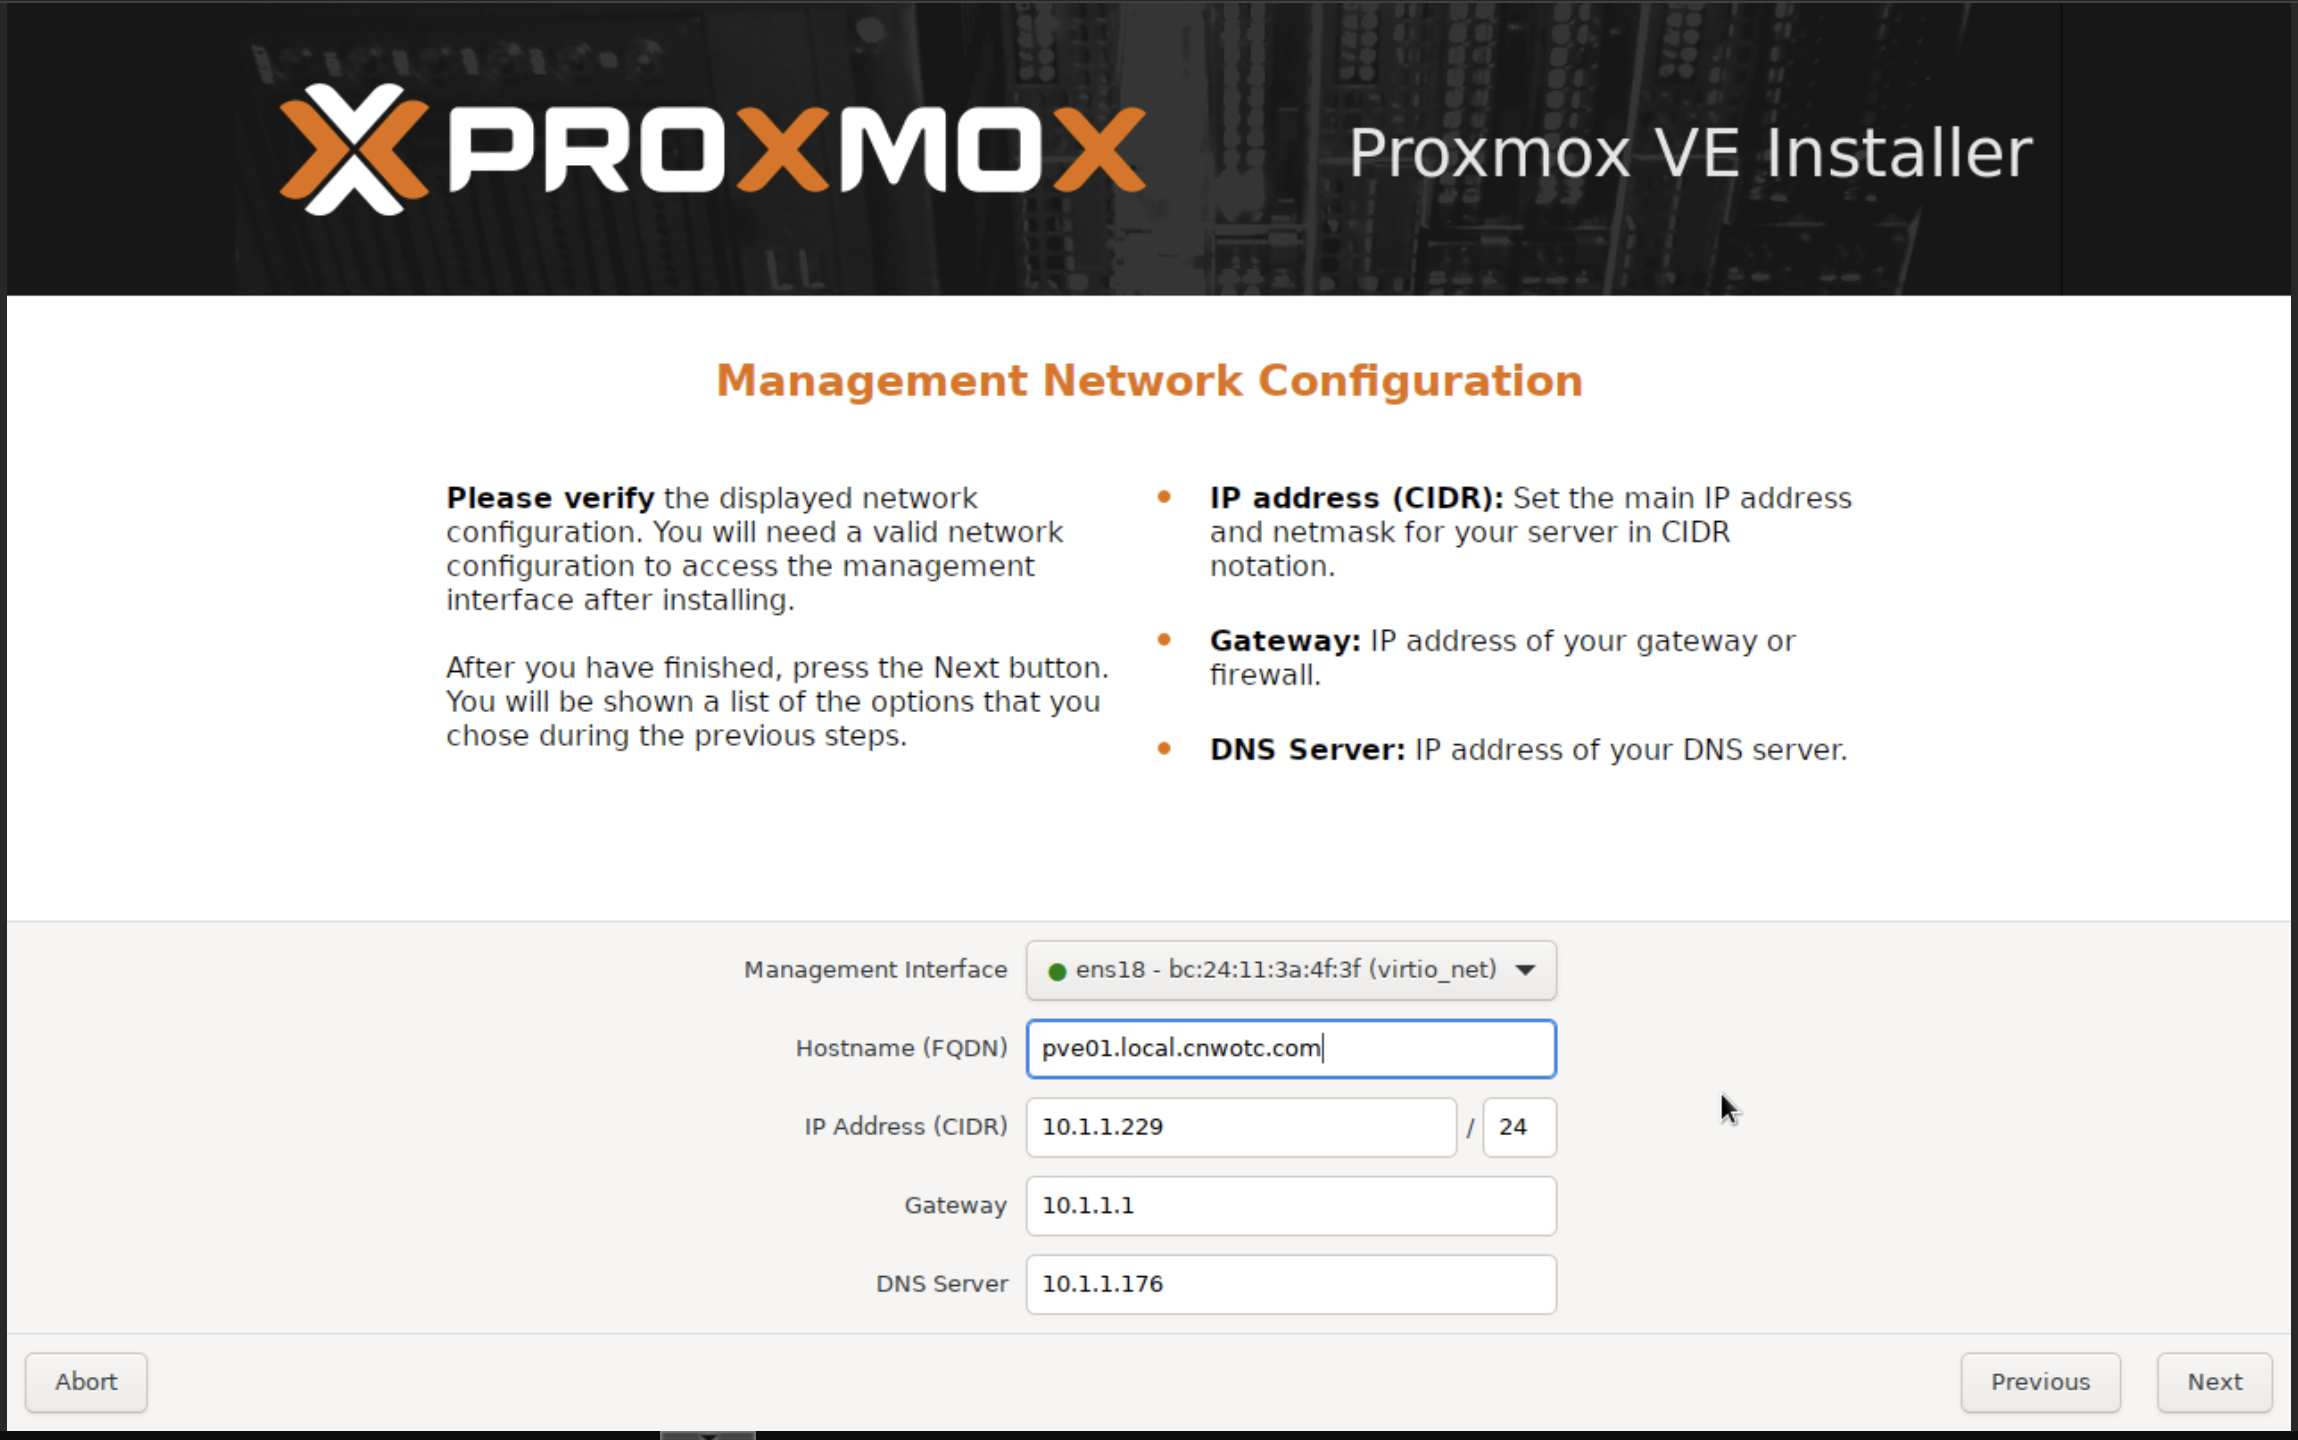
On the network selection screen, you will need to enter a number of values:
- Management interface: If you only have one ethernet connection, then this likely will only display one option. If you have multiple, be sure to select the one you want to be able to access the Proxmox UI over
- Hostname: This is the fully qualified domain name (FQDN) where Proxmox will be located. In this example, I am the host is
pve01, and on the.local.cnwotc.comnetwork. Note that this doesn’t create a DNS entry on your network, only tells Proxmox where it is expected to be accessed at. - IP Address: This is the IP address where Proxmox will be accessible. Make a note of this!
- Gateway: This is the IP address of your network gateway
- DNS Server: The IP address of your DNS server. Often this is the same as your gateway IP, but not always (such as in this case)
Finally, click next, review your settings, and then select install. Depending on your hardware, the installation may a few minutes. Once the installation is complete, restart the system.
Accessing Proxmox
Once your Proxmox server has restarted, it will be accessible over the network. Assuming all is well, all future administration will be done over the network.
To access the Web UI, visit https://<Your Server IP>:8006 in your browser. So for example, if your IP was 10.1.1.5, you’d visit https://10.1.1.5:8006 in your browser.
You will first get an error regarding a self-signed certificate. This is to be expected and is okay. Proxmox created its own HTTPS certificate during installation, which is not signed by a trusted authority. Accept the risk, and continue, you should see a login screen like this:
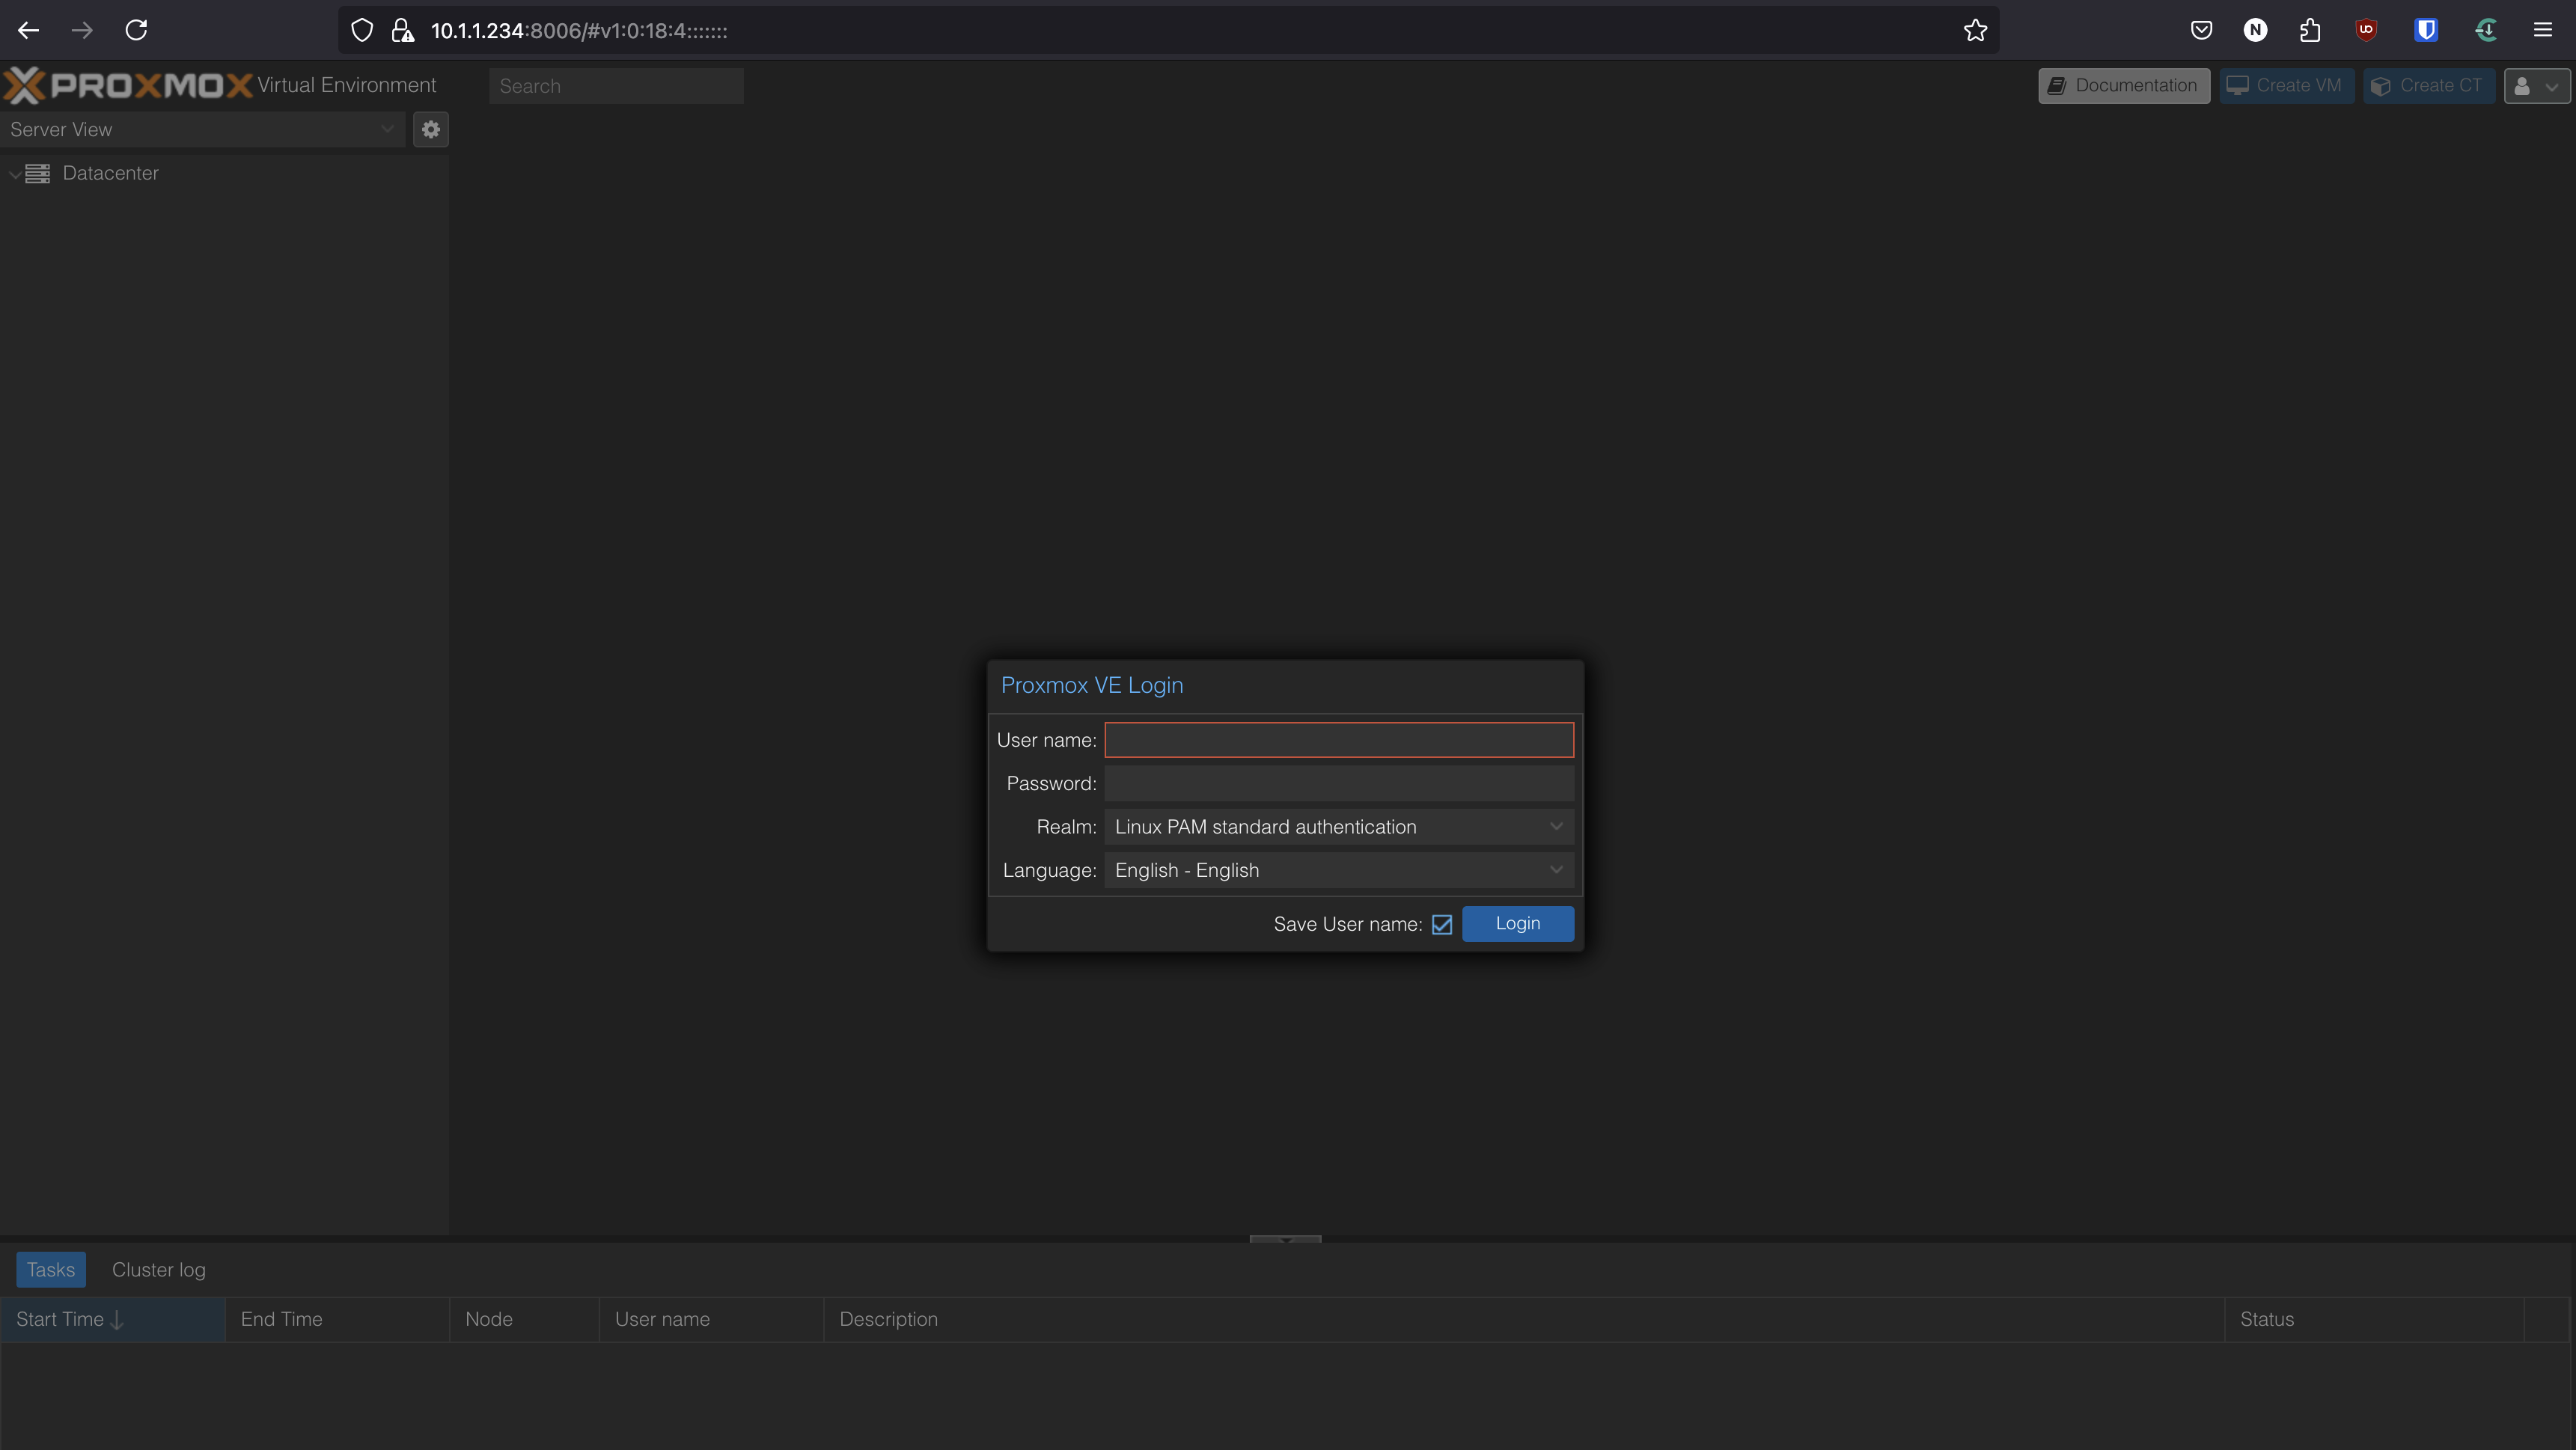
Sign in using the username root and the password you set during installation. When you sign in, you’ll get a notification about your server not being licensed. That’s also okay; while you can pay for a subscription for additional support from Proxmox, for our purposes there is no need for that. Simply select “OK” here and continue.
Congratulations! You have installed your first hypervisor!
Creating your first Virtual Machine
As a quick demonstration, we’ll also create our first virtual machine. In future parts, we’ll discuss how to automate this process and make it faster using Terraform, but in order to appreciate the manual process (and how much better it could be) it’s valuable to do this at least once manually.
We’ll be creating a basic Ubuntu server VM.
The Ubuntu ISO
First, we’ll need to obtain the Ubuntu server ISO. Visit the Ubuntu Server website to download the latest version (as of this writing, that is version 24.04.2 LTS). Once you have downloaded the .iso file to your computer, you’ll want to upload it into Proxmox.
To do this select the “local” disk in your Proxmox side bar, then select “ISO Images”:
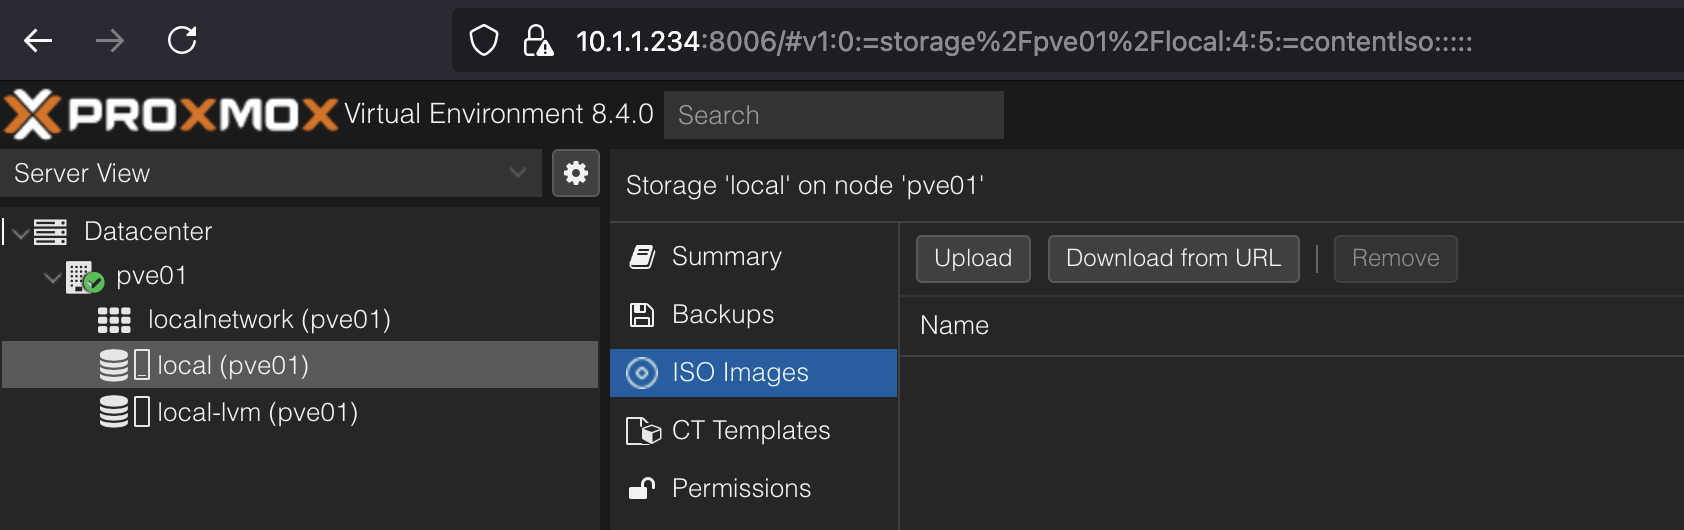
Next, select “upload”, and select the file you just downloaded from the Ubuntu website. Alternatively, you can click “Download from URL” and copy the download URL for the Ubuntu ISO, and download it directly to your Proxmox server. Either will achieve the same result.
Creating the Virtual Machine
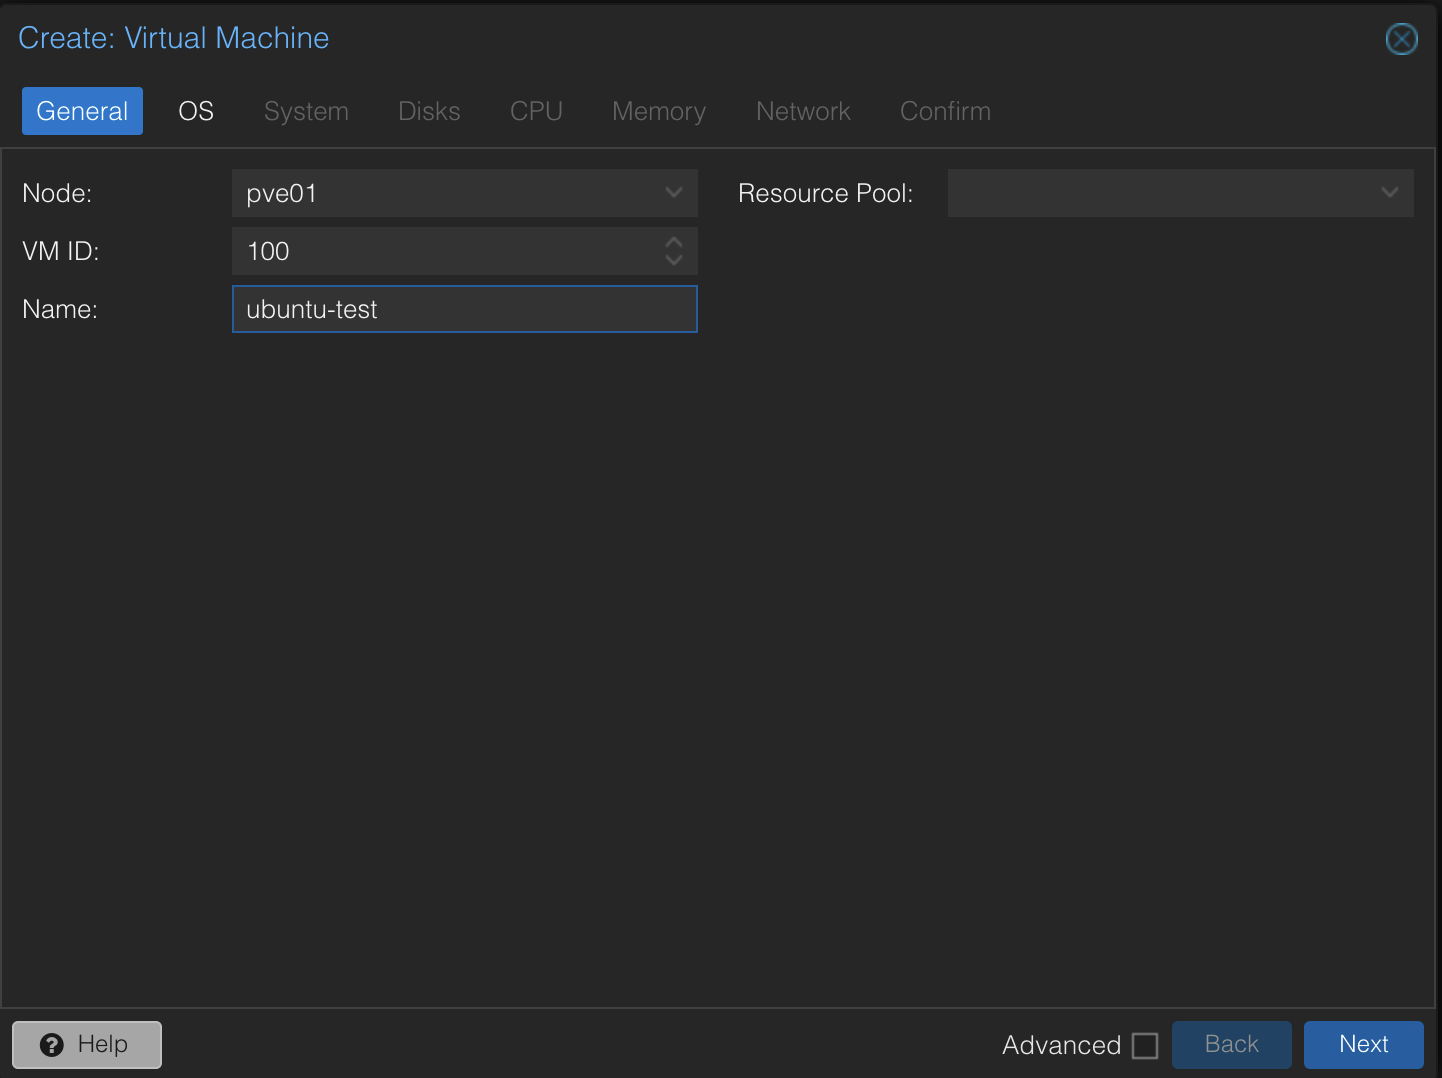
In the upper right of the Proxmox interface, select “Create VM”. Here, ensure that the name of the server you created is selected under “Node” (in my case, pve01). You can either customize the VM ID here or leave it as the default 100. Name the server ubuntu-test and leave the “resource pool” field empty.
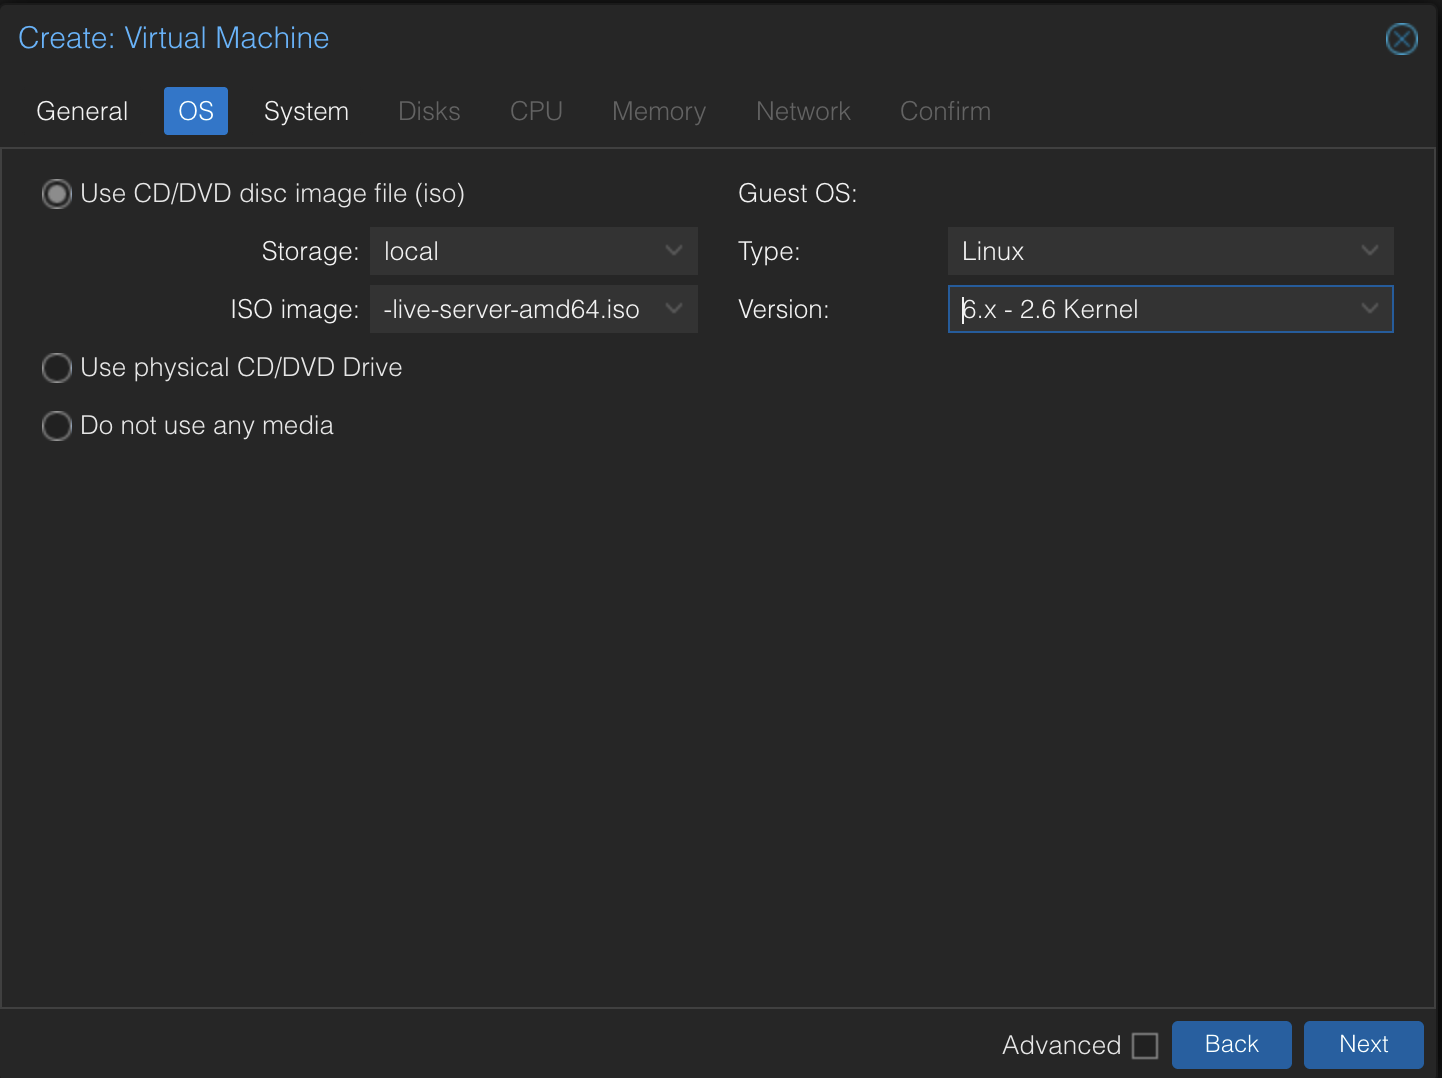
On the next screen, we’ll configure the operating system. Select the Ubuntu ISO image from the ISO image dropdown and click next.
Leave the System screen as default and select next.
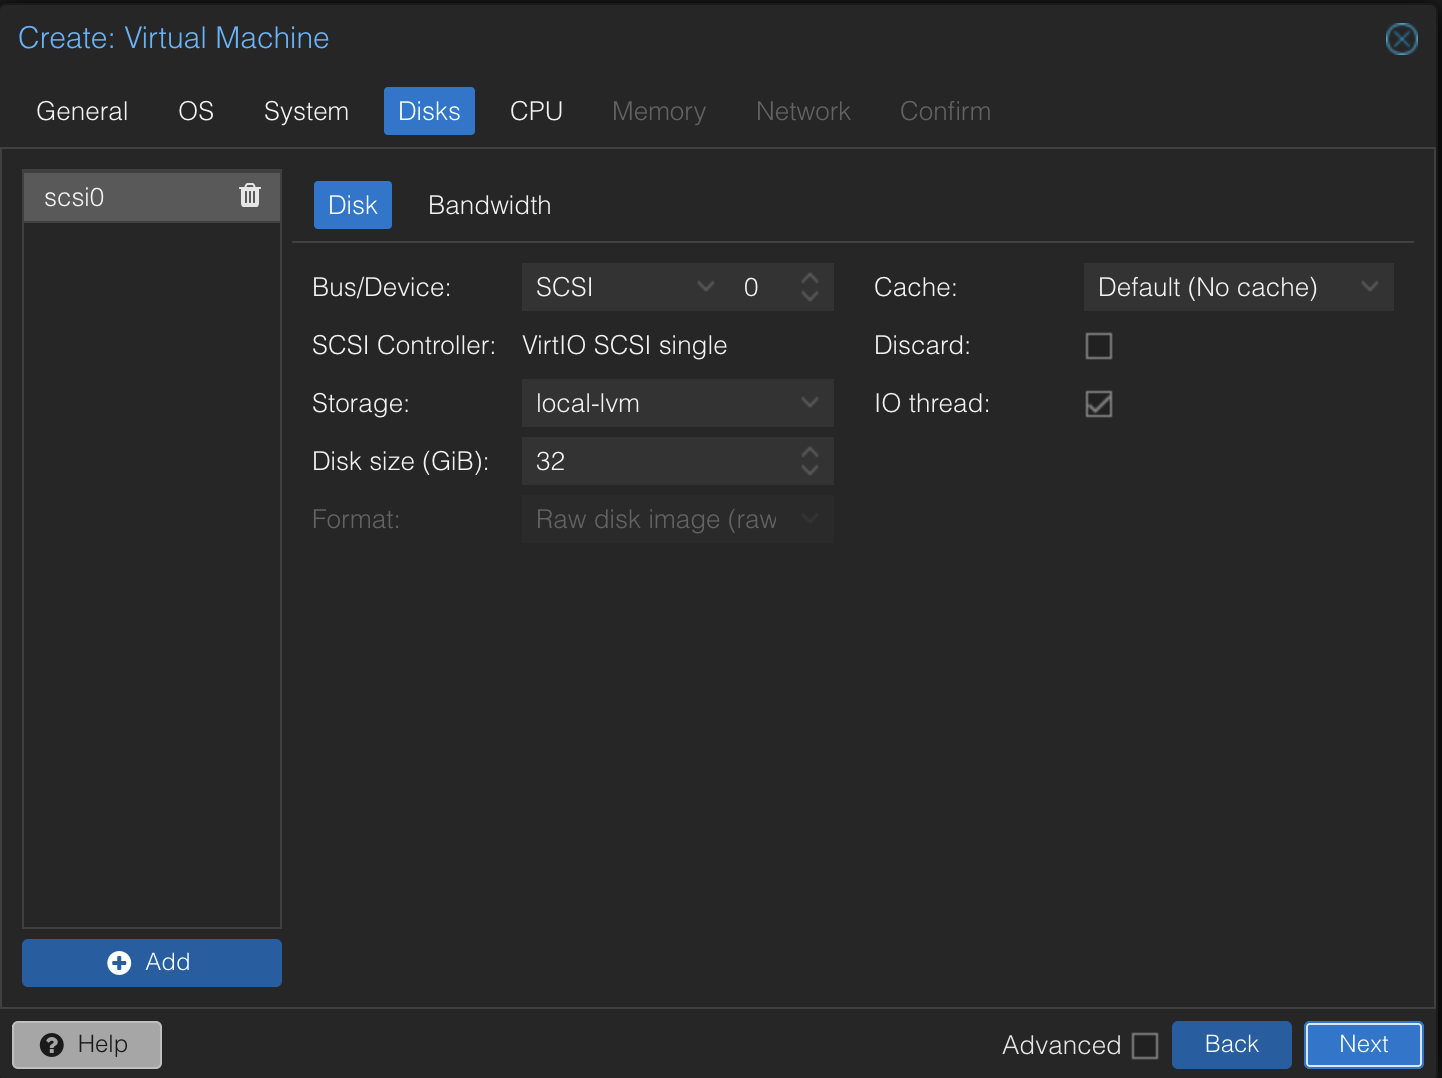
On the Disks screen, ensure that the select storage is local-lvm and the size is 32
On the CPU screen, leave the default CPU type, and leave the default core and sock allocations both as 1.
On the memory screen, leave the default selection of 2048 MB.
On the network screen, ensure that the selected bridge is vmbr0, and continue.
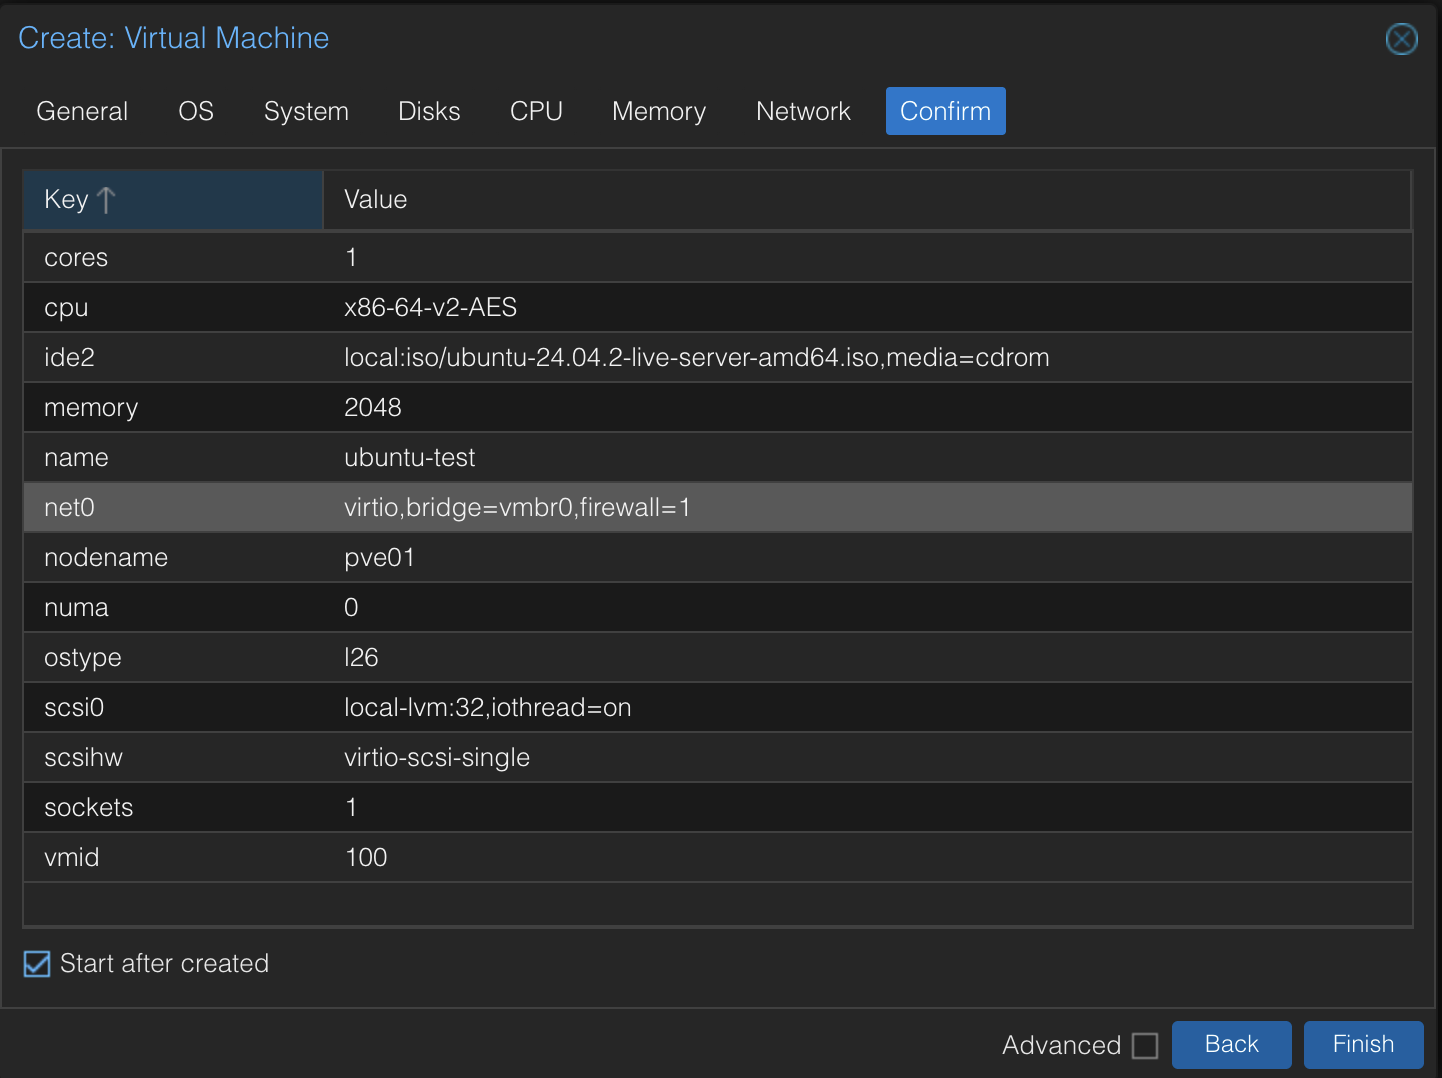
On the confirmation screen, select the box for “Start after created” before selecting “Finish”.
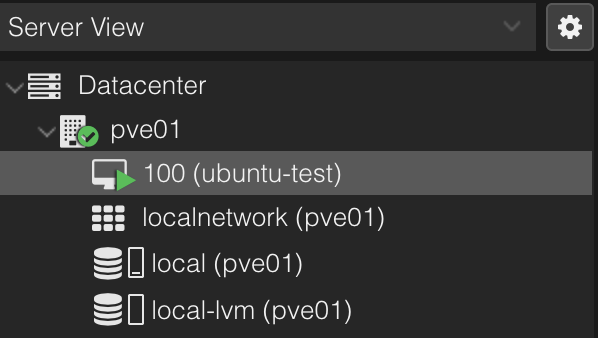
Once you select finish, wait a few moments and the VM will appear in your left sidebar. At first it will only appear as 100, the VM ID. A few seconds later, the VM name will appear there with a small green play button to indicate that the VM is powered on:
Installing Ubuntu
Once the VM has started, select it in the sidebar. You’ll initially be dropped to the summary screen but instead select the console screen in the sidebar.
You should see a Ubuntu installation console screen. Click your mouse into this screen to bind your keyboard inputs to the console.
You may first see a menu asking you what to do with the Ubuntu Installation media, if so select “Try or Install Ubuntu Server” using the enter key. After that, you should see the language selection screen.
Select English or your preferred language using the arrow keys and enter key on your keyboard.
Next, you’ll be prompted to select your keyboard layout, if not the default for your language. You may do so here or select Done with your enter and arrow keys.
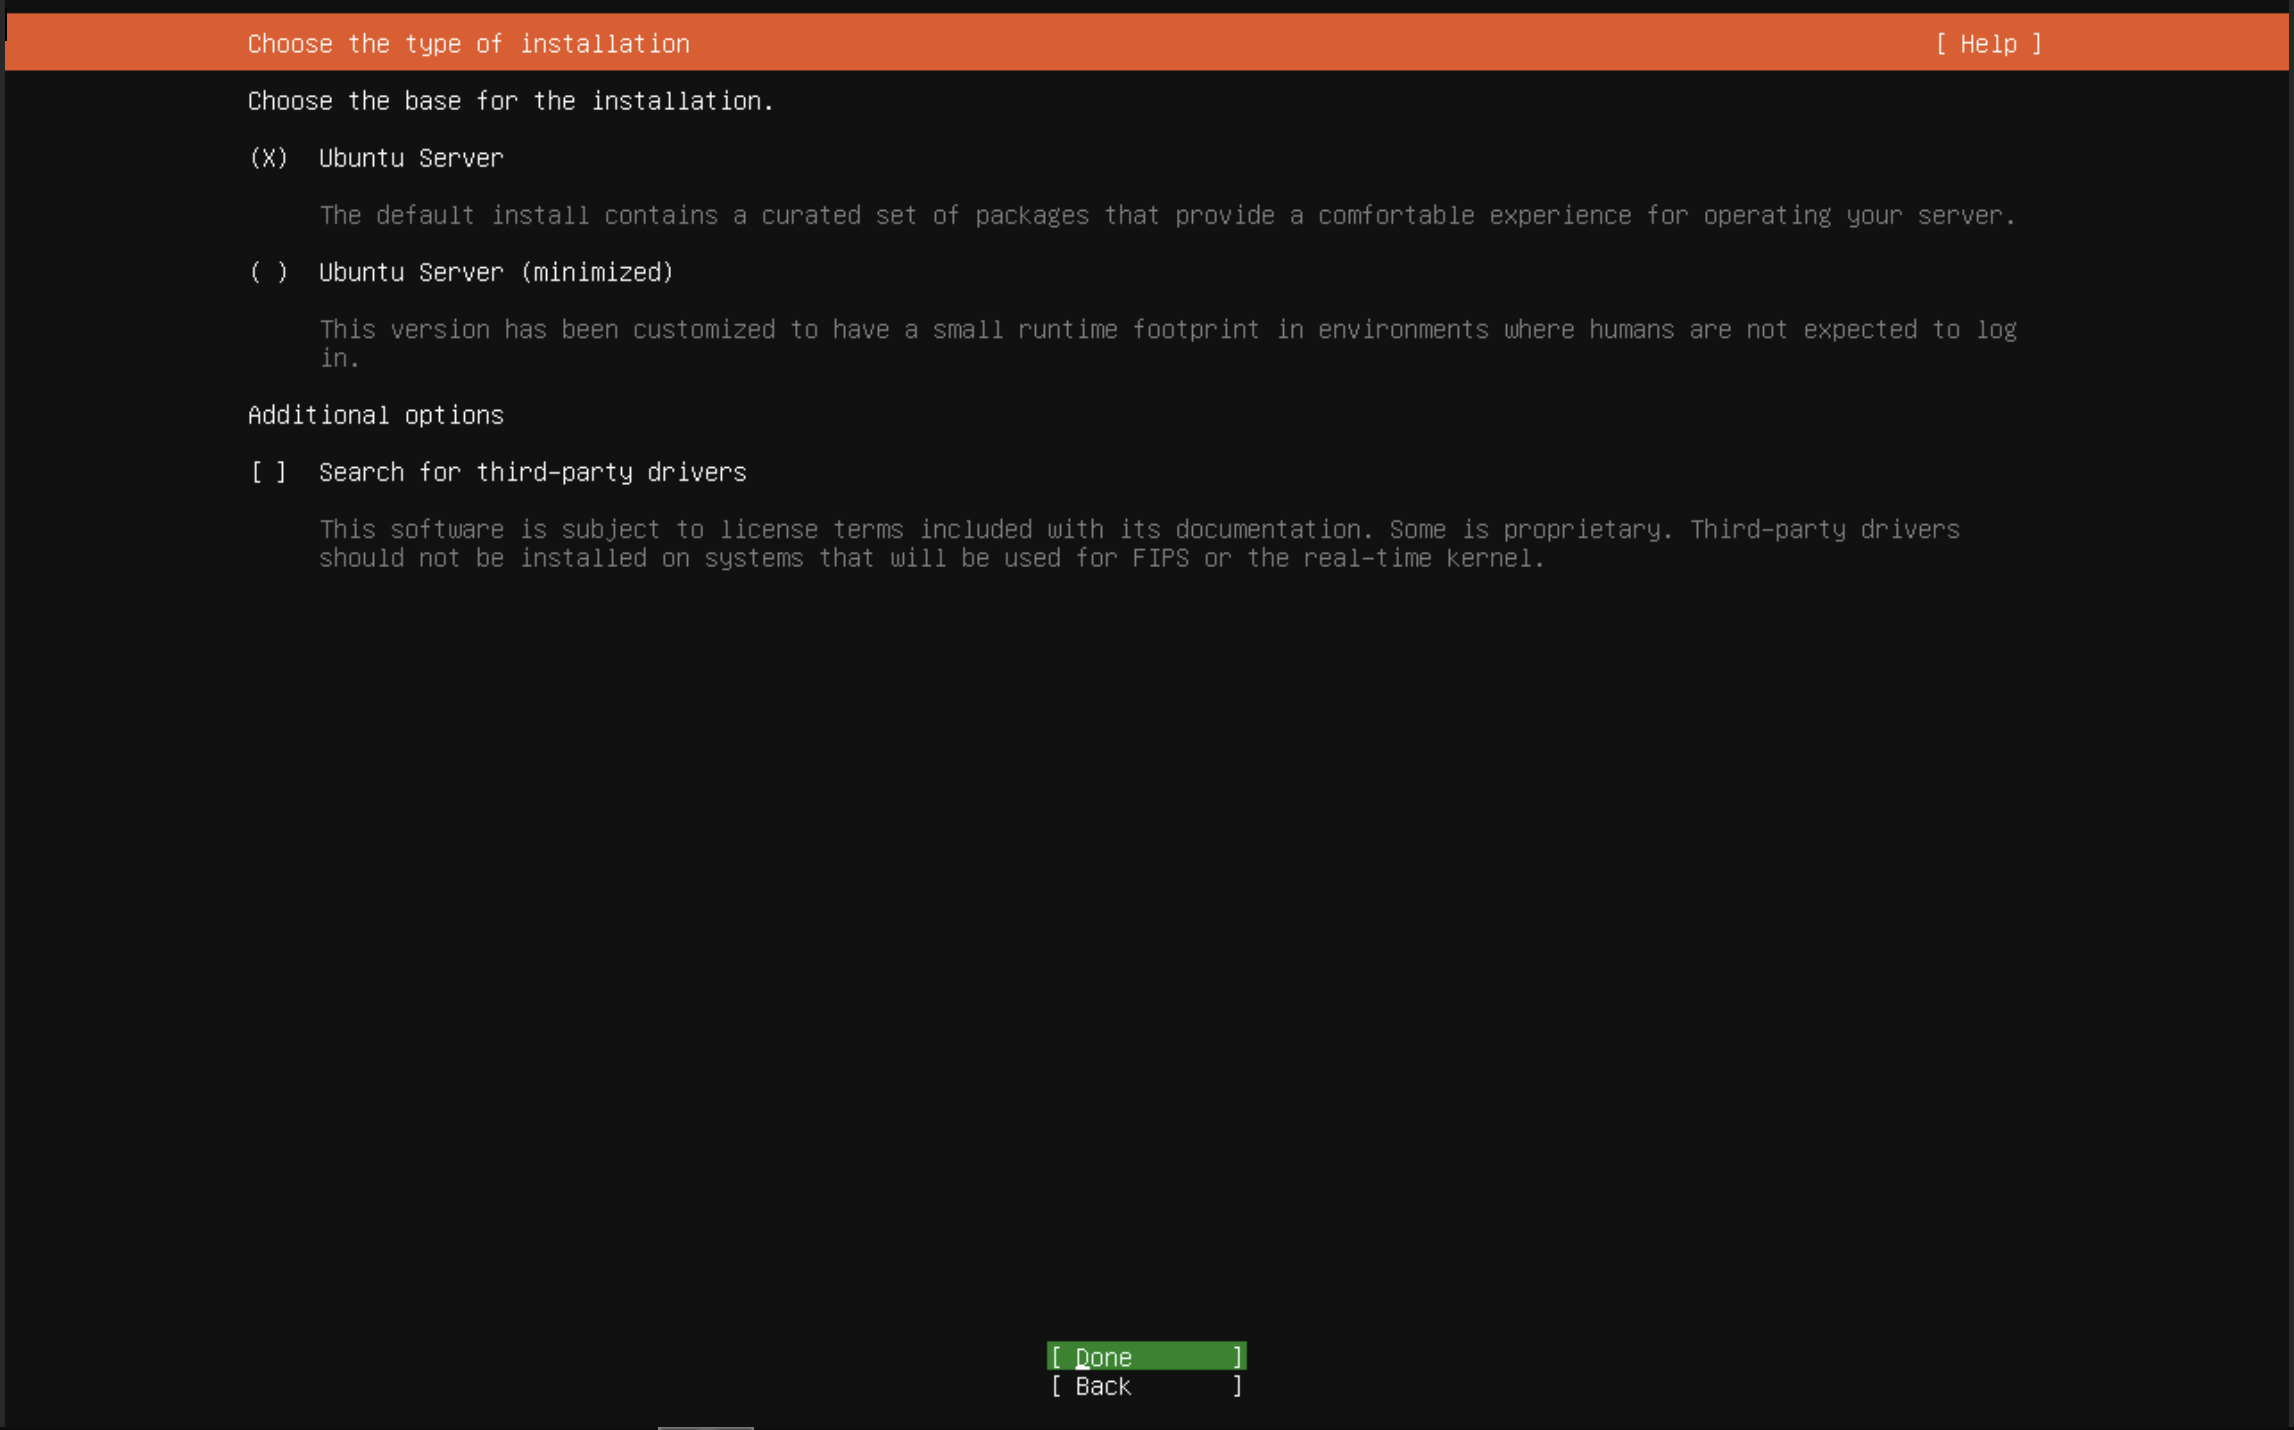
On the installation type selection screen, the installer has pre-selected the full Ubuntu Server experience. For now, we’ll leave this on the default. Select enter to continue
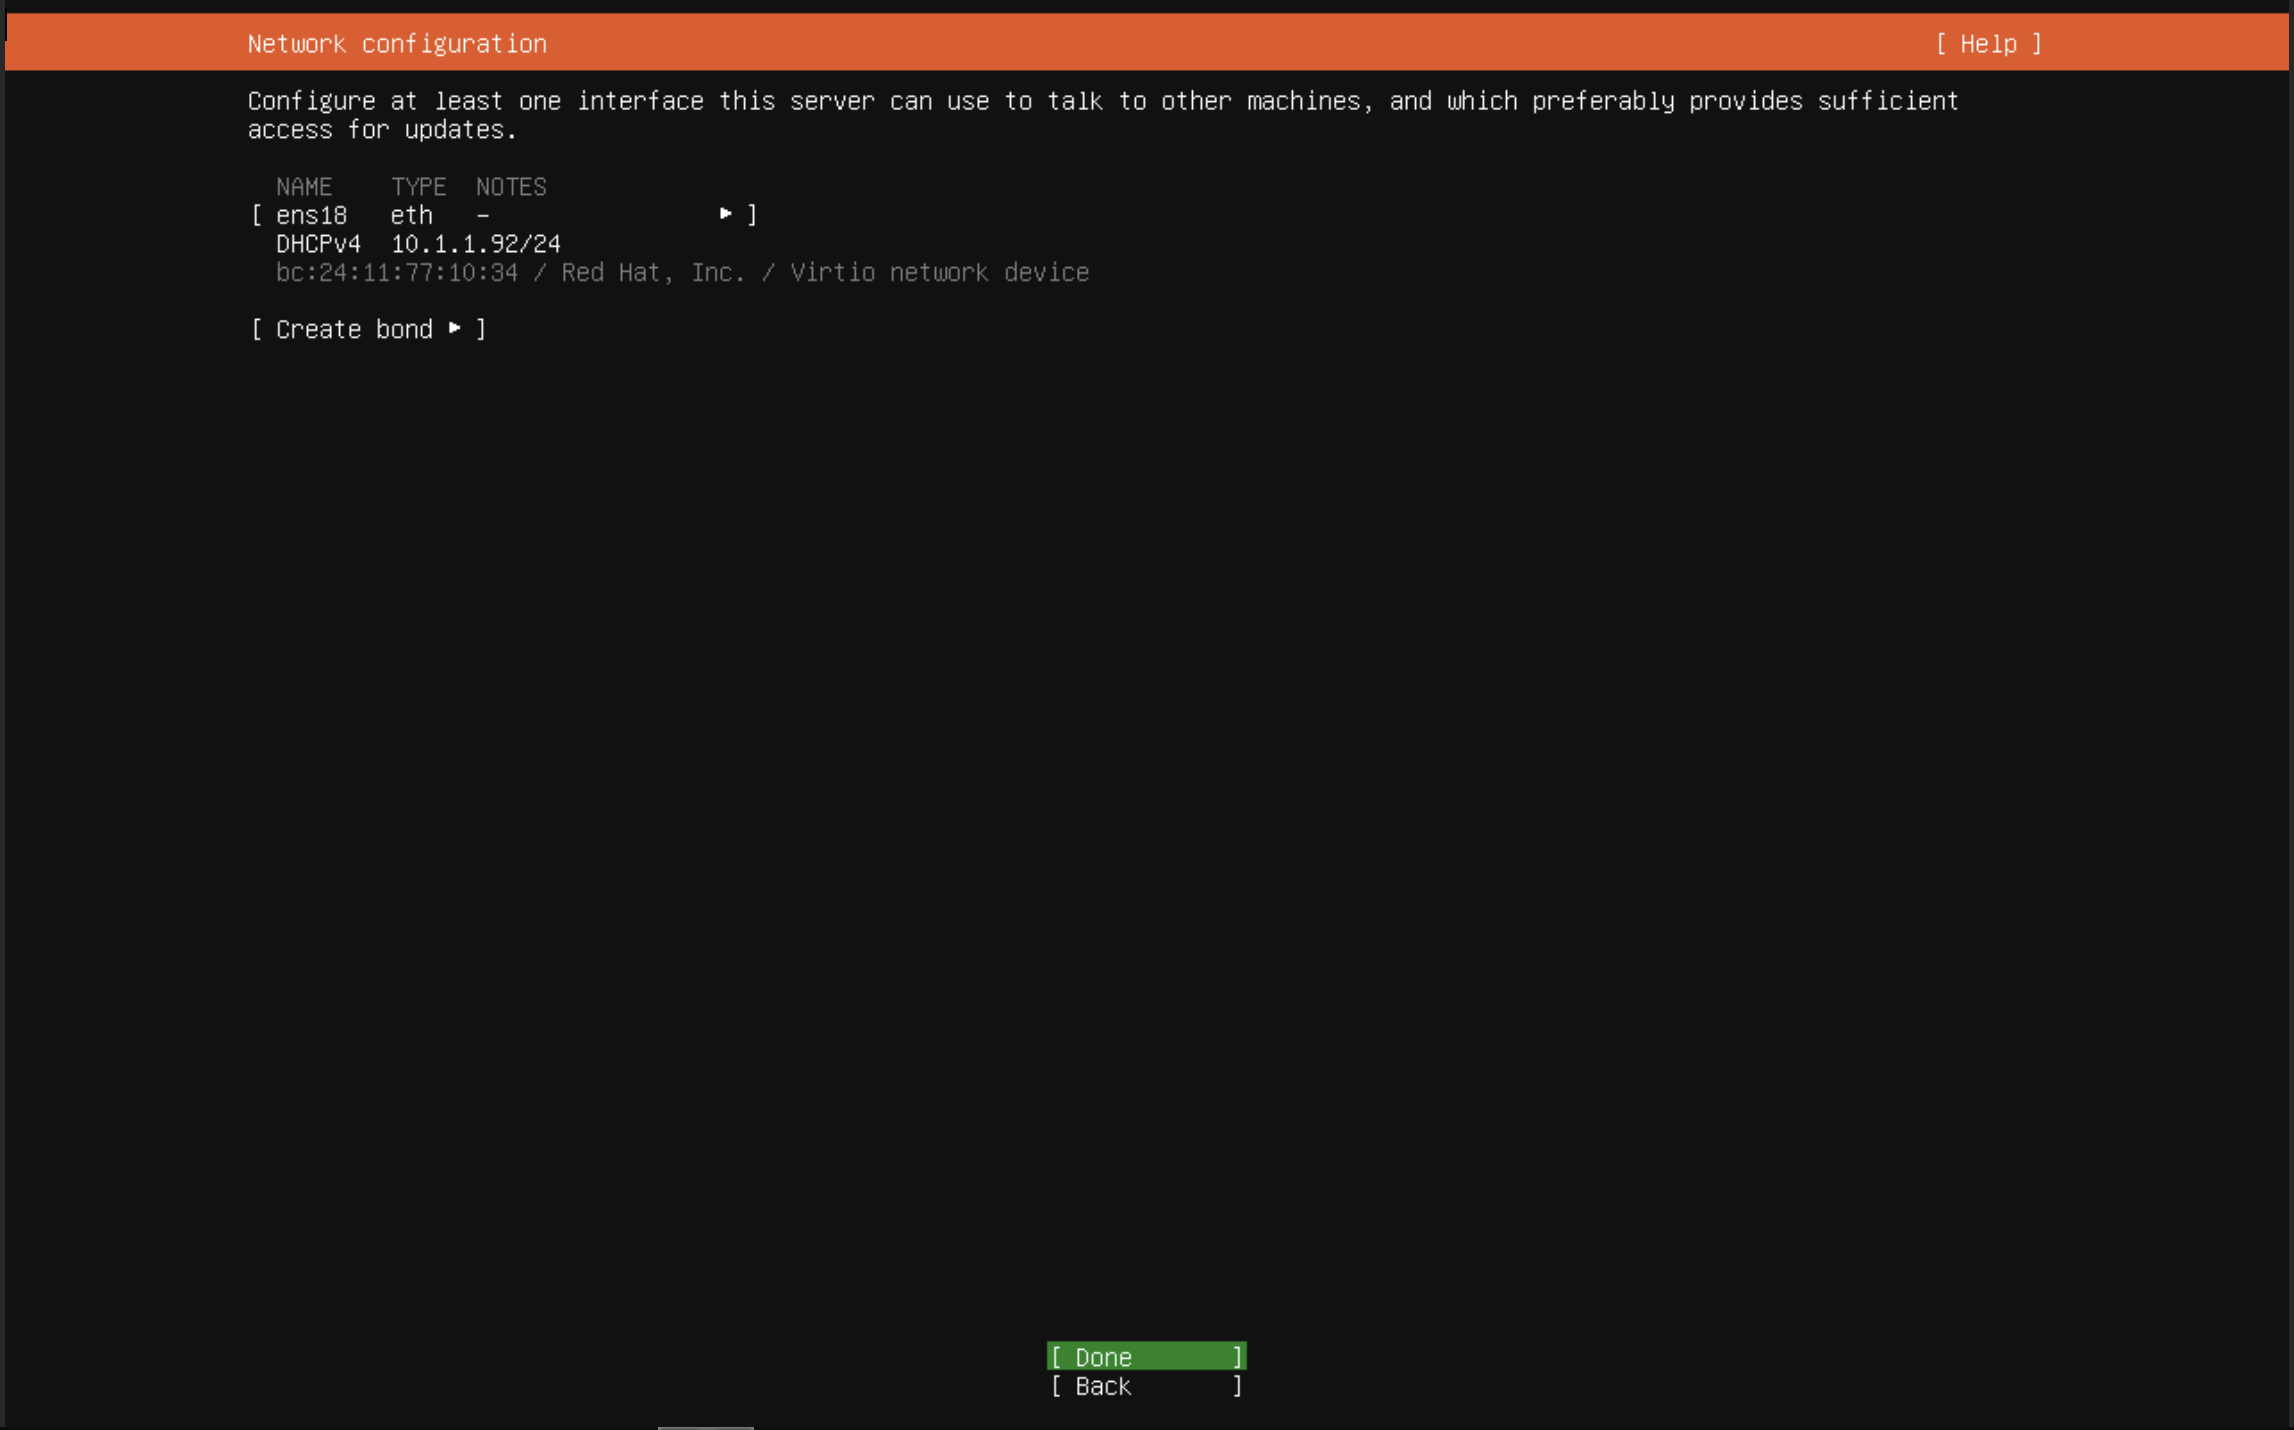
On the network selection screen, if your networking was configured right during the VM creation (and you have a DHCP server on your network), an IP address should automatically be provisioned to the system. If not, you can use the arrow keys to highlight the interface name. Select it with enter, and then select edit IPv4. Change the IPv4 Method to static and enter your desired IP settings.
Once you are satisfied with the IP settings, select Done.
On the next screen, select “Done” and skip the proxy settings
On the following screen, Ubuntu will automatically test your network connectivity. If configured properly, you should be notified that the default selected mirror location passed tests.
If for some reason your network tests failed, you can still continue the installation without network connectivity; we won’t actually be using networking on this demo VM.
Click Done to continue
On the disk configuration screen, leave the default selected disk (we only created one disk in the VM creation screen). However, deselect the option for “Set up this disk as an LVM group”, as that is not required for our current install.
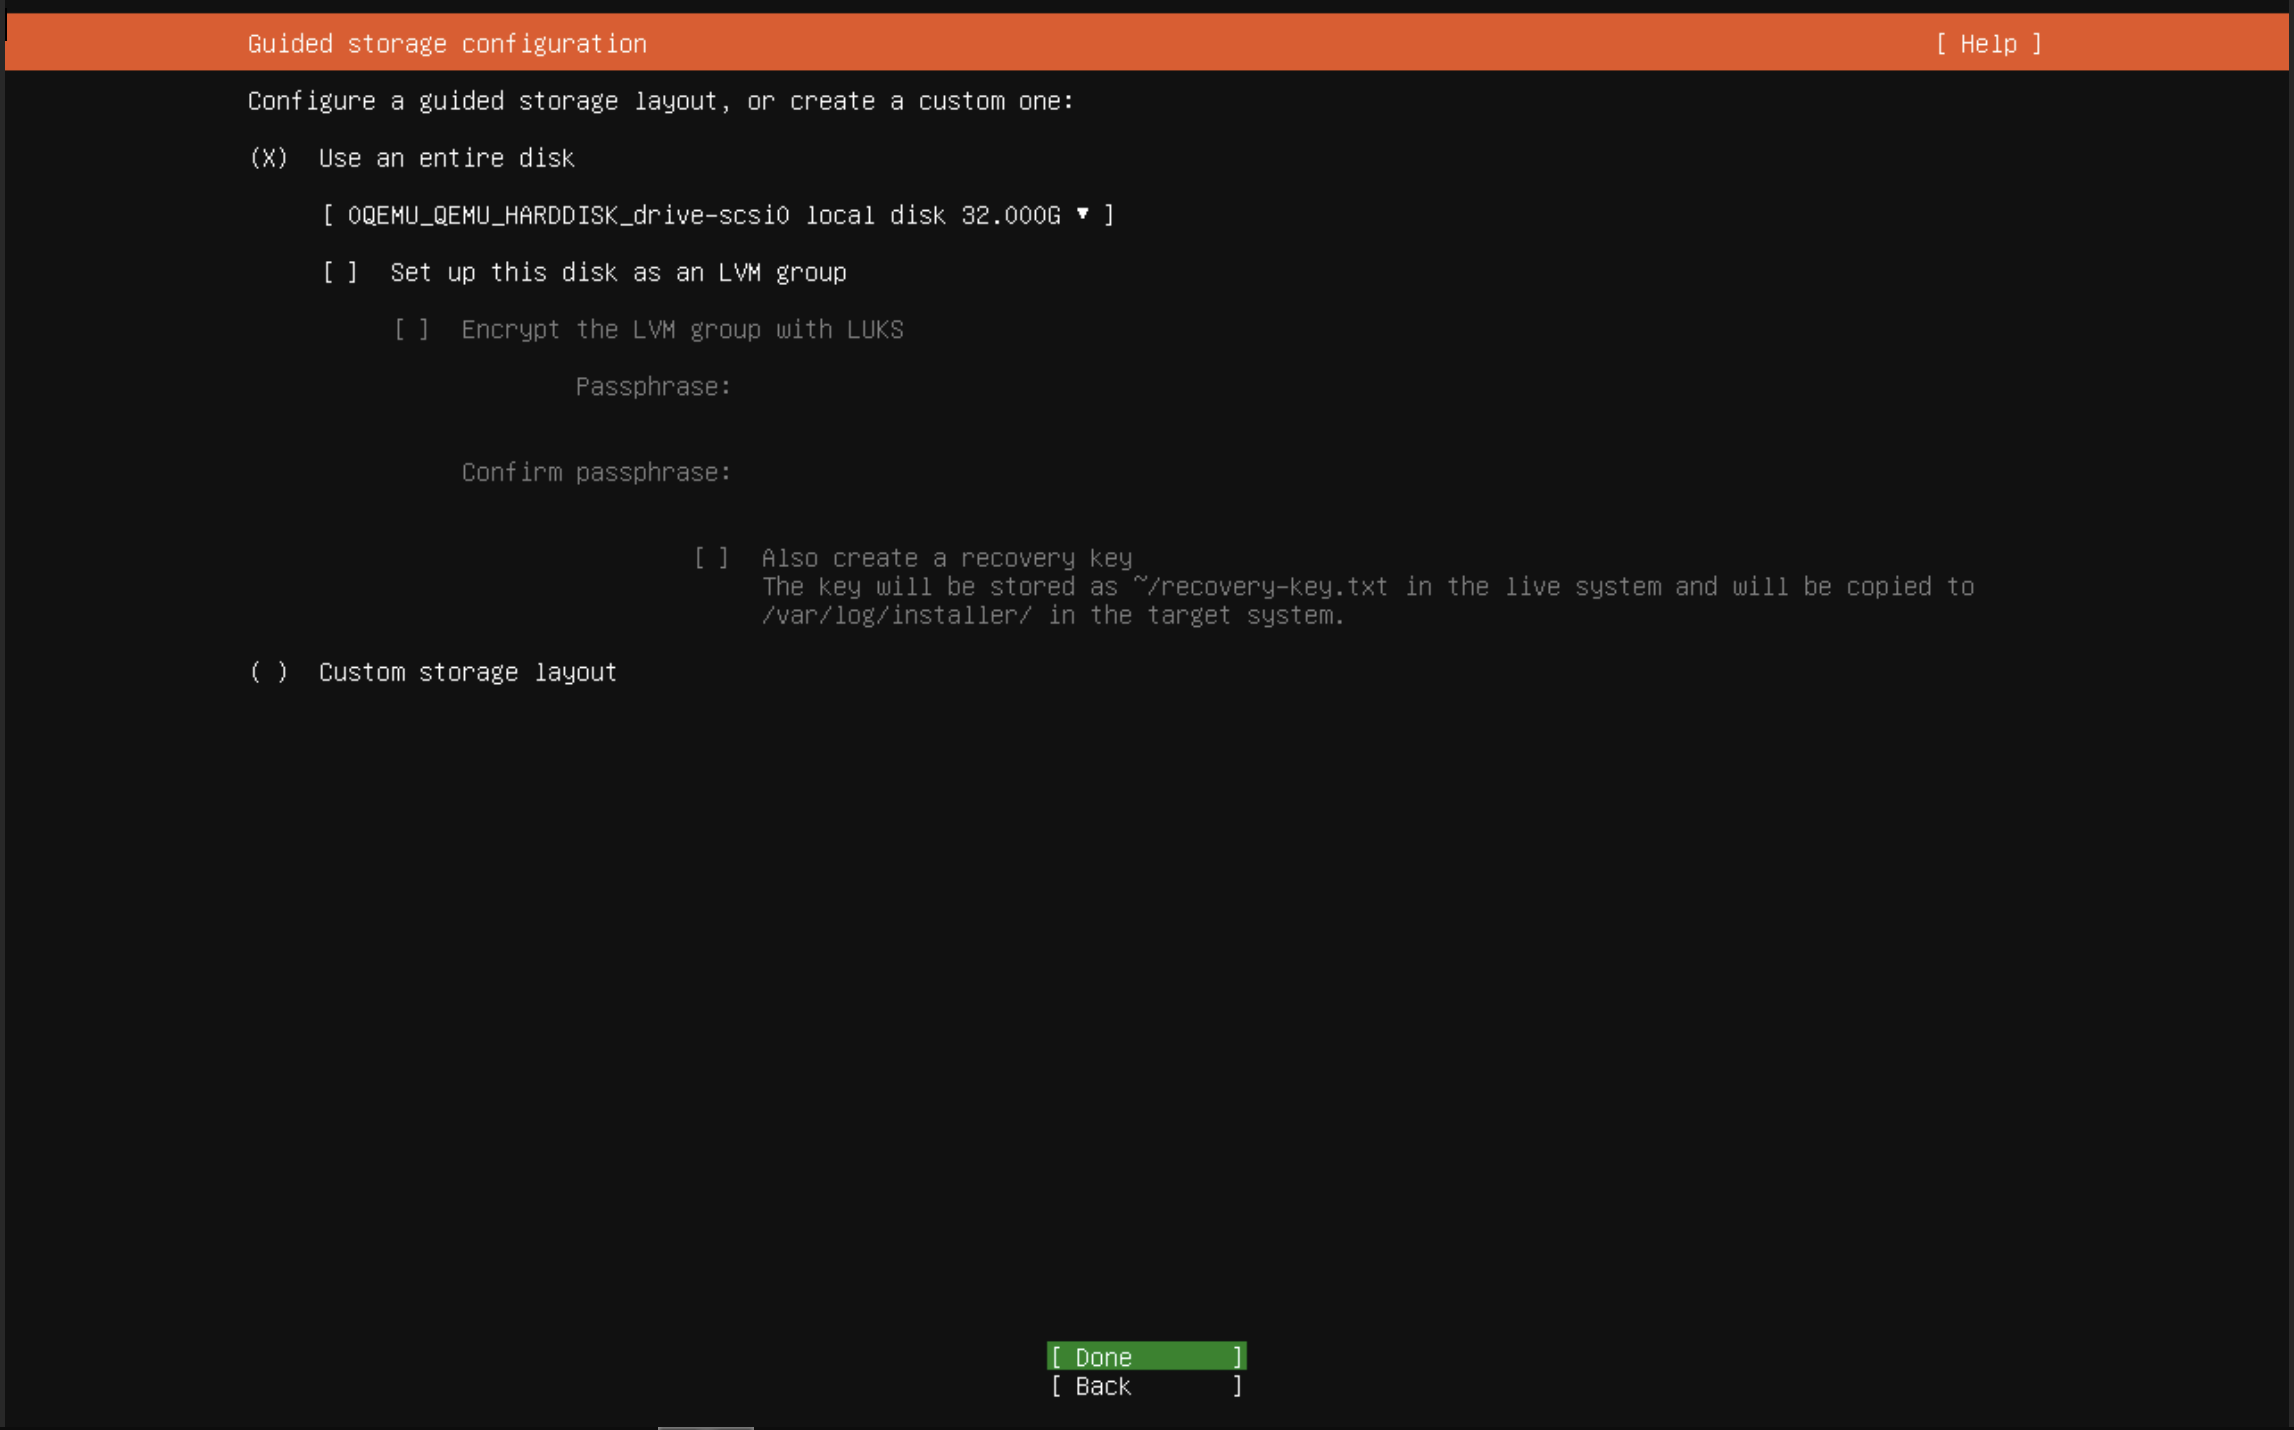
Select Done to continue
Accept the default file system summary on the next screen by selecting Done. The system will warn you about data loss but remember that this is a brand new blank virtual disk; there’s no data here! Despite being run on the same physical system as your Proxmox server, the Ubuntu server has its own virtual disk which is isolated from the Proxmox installation.
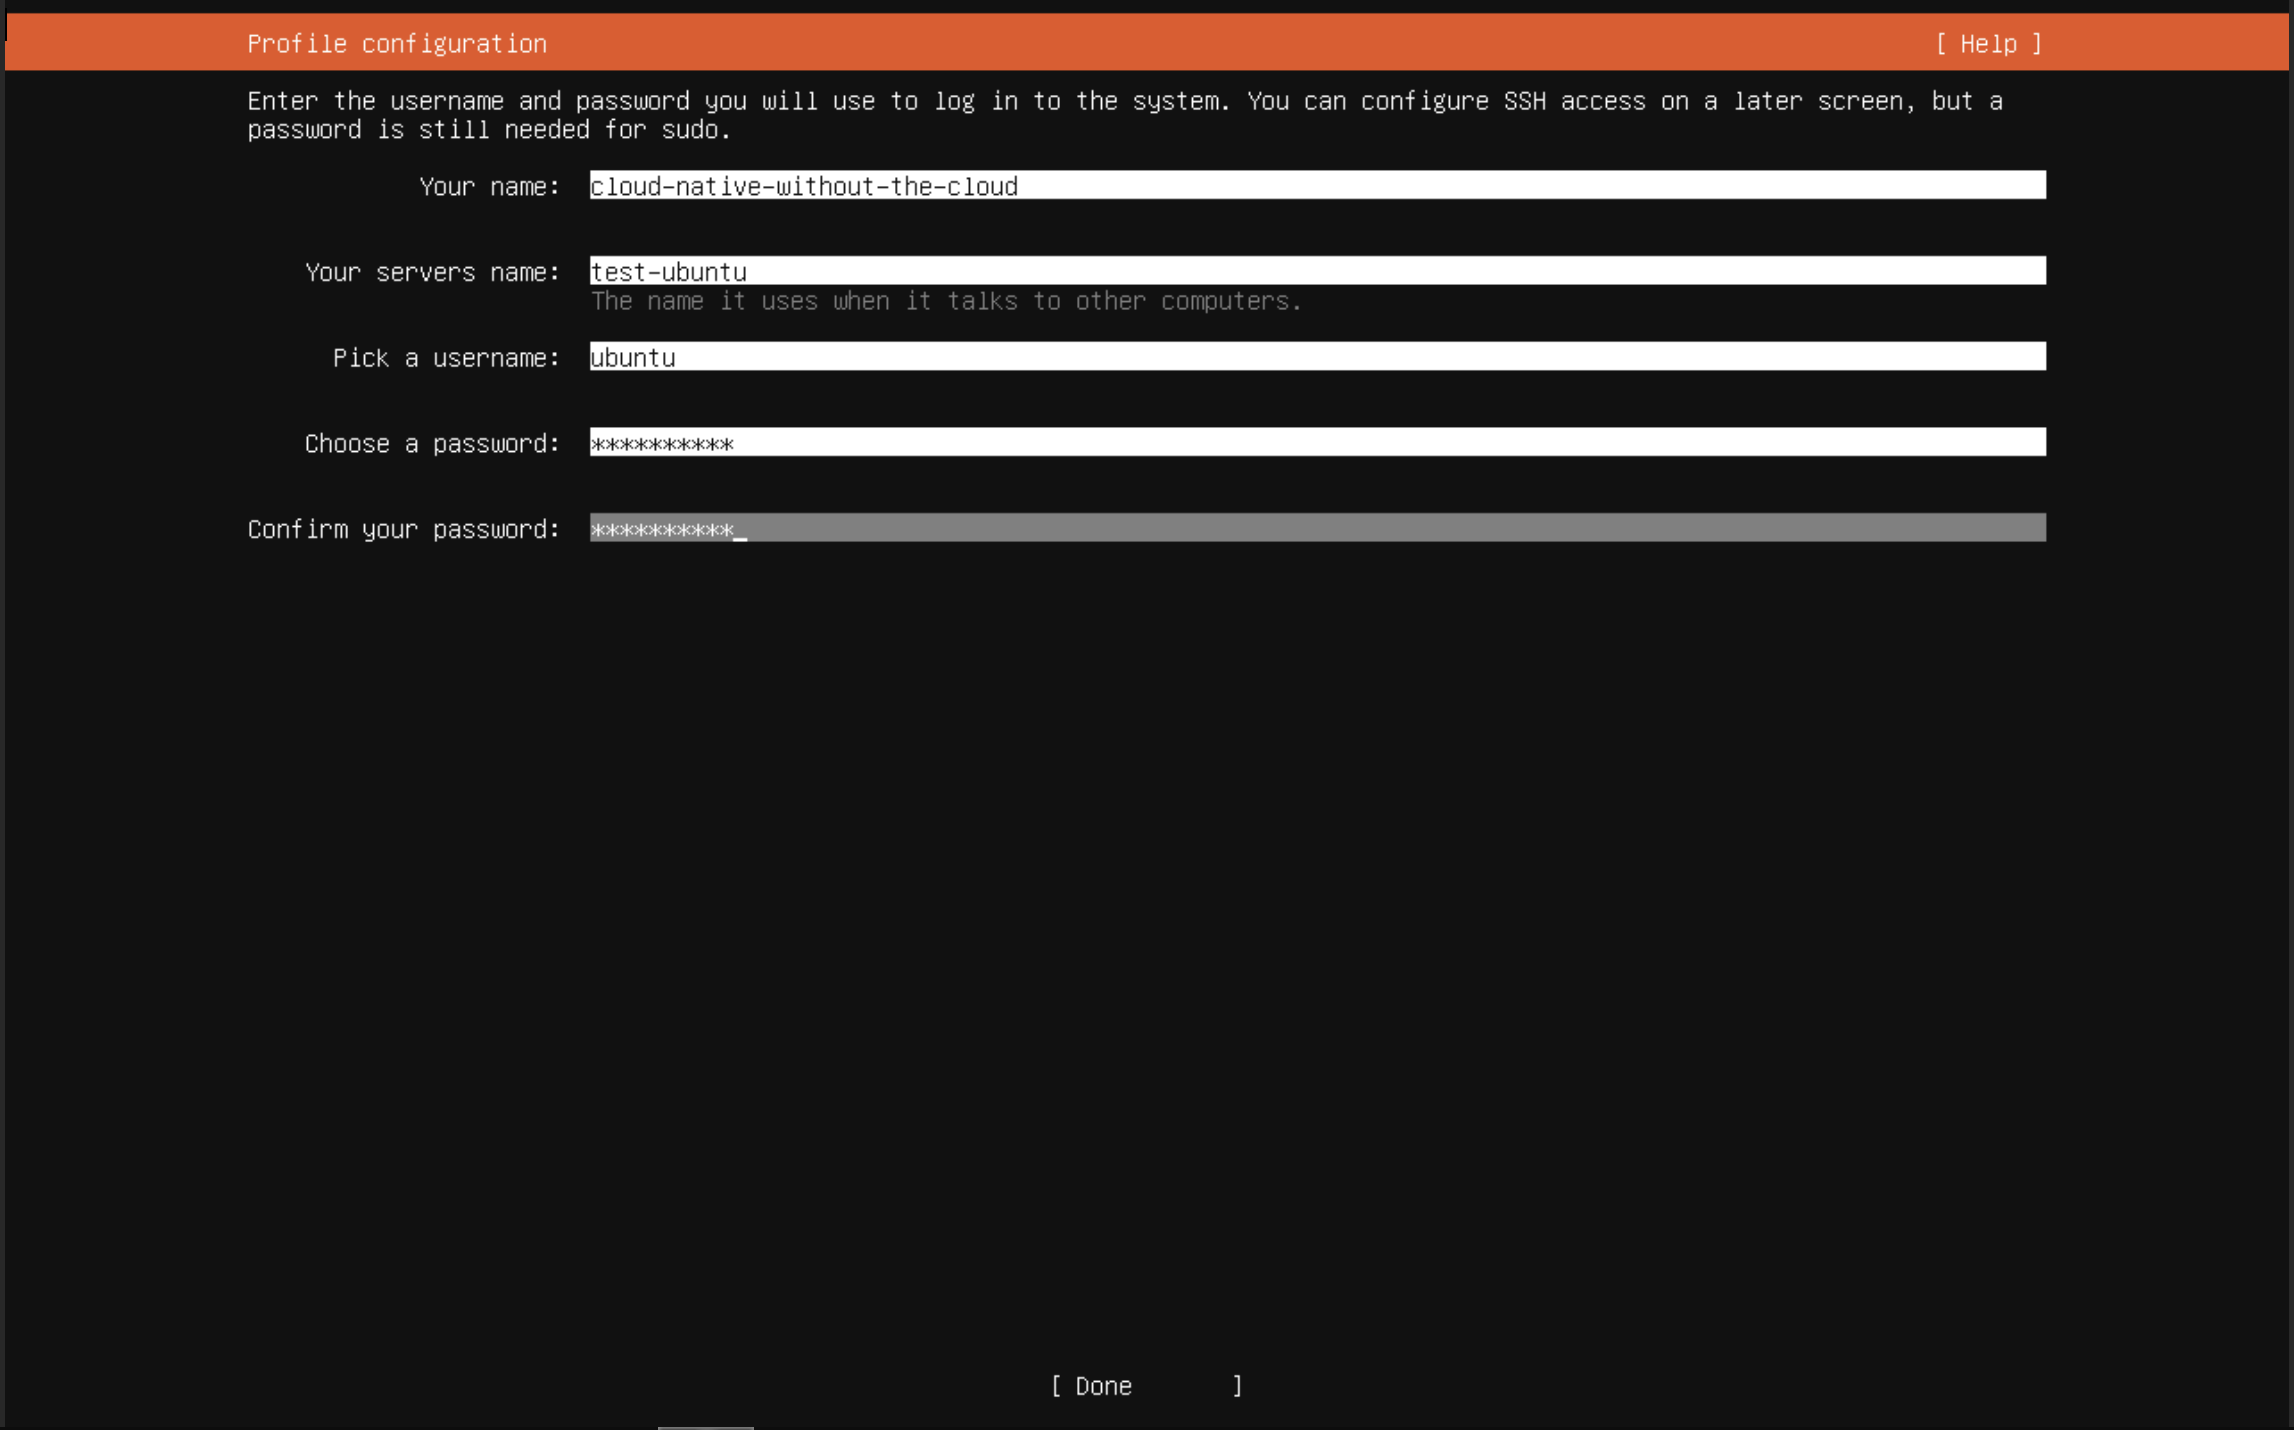
On the profile configuration screen, enter whatever you wish for “Your Name”. Set the server’s name to test-ubuntu, and the username to ubuntu. Enter and confirm a password you’ll remember, before selecting Done to continue
On the next screen, when prompted to use Ubuntu Pro, use the default selection of “skip for now” and click Done
On the next screen you can chose to either install or not install OpenSSH server. Ideally, you’ll want all of your VMs to be accessible via SSH, which OpenSSH enables. However, we won’t be using it on this demo VM so it’s not strictly necessary.
Don’t select any server snaps on the next screen, we won’t be needing any of them (and generally we’ll be avoiding snaps anyway in this series). Click Done to begin server installation.
Server installation will take a few minutes to complete. Once it has completed, select “reboot now”. You may get warnings on the next screen about a CD-ROM, that’s okay, select enter and continue.
Your VM will reboot, and after a few moments, you’ll see the Ubuntu login screen:

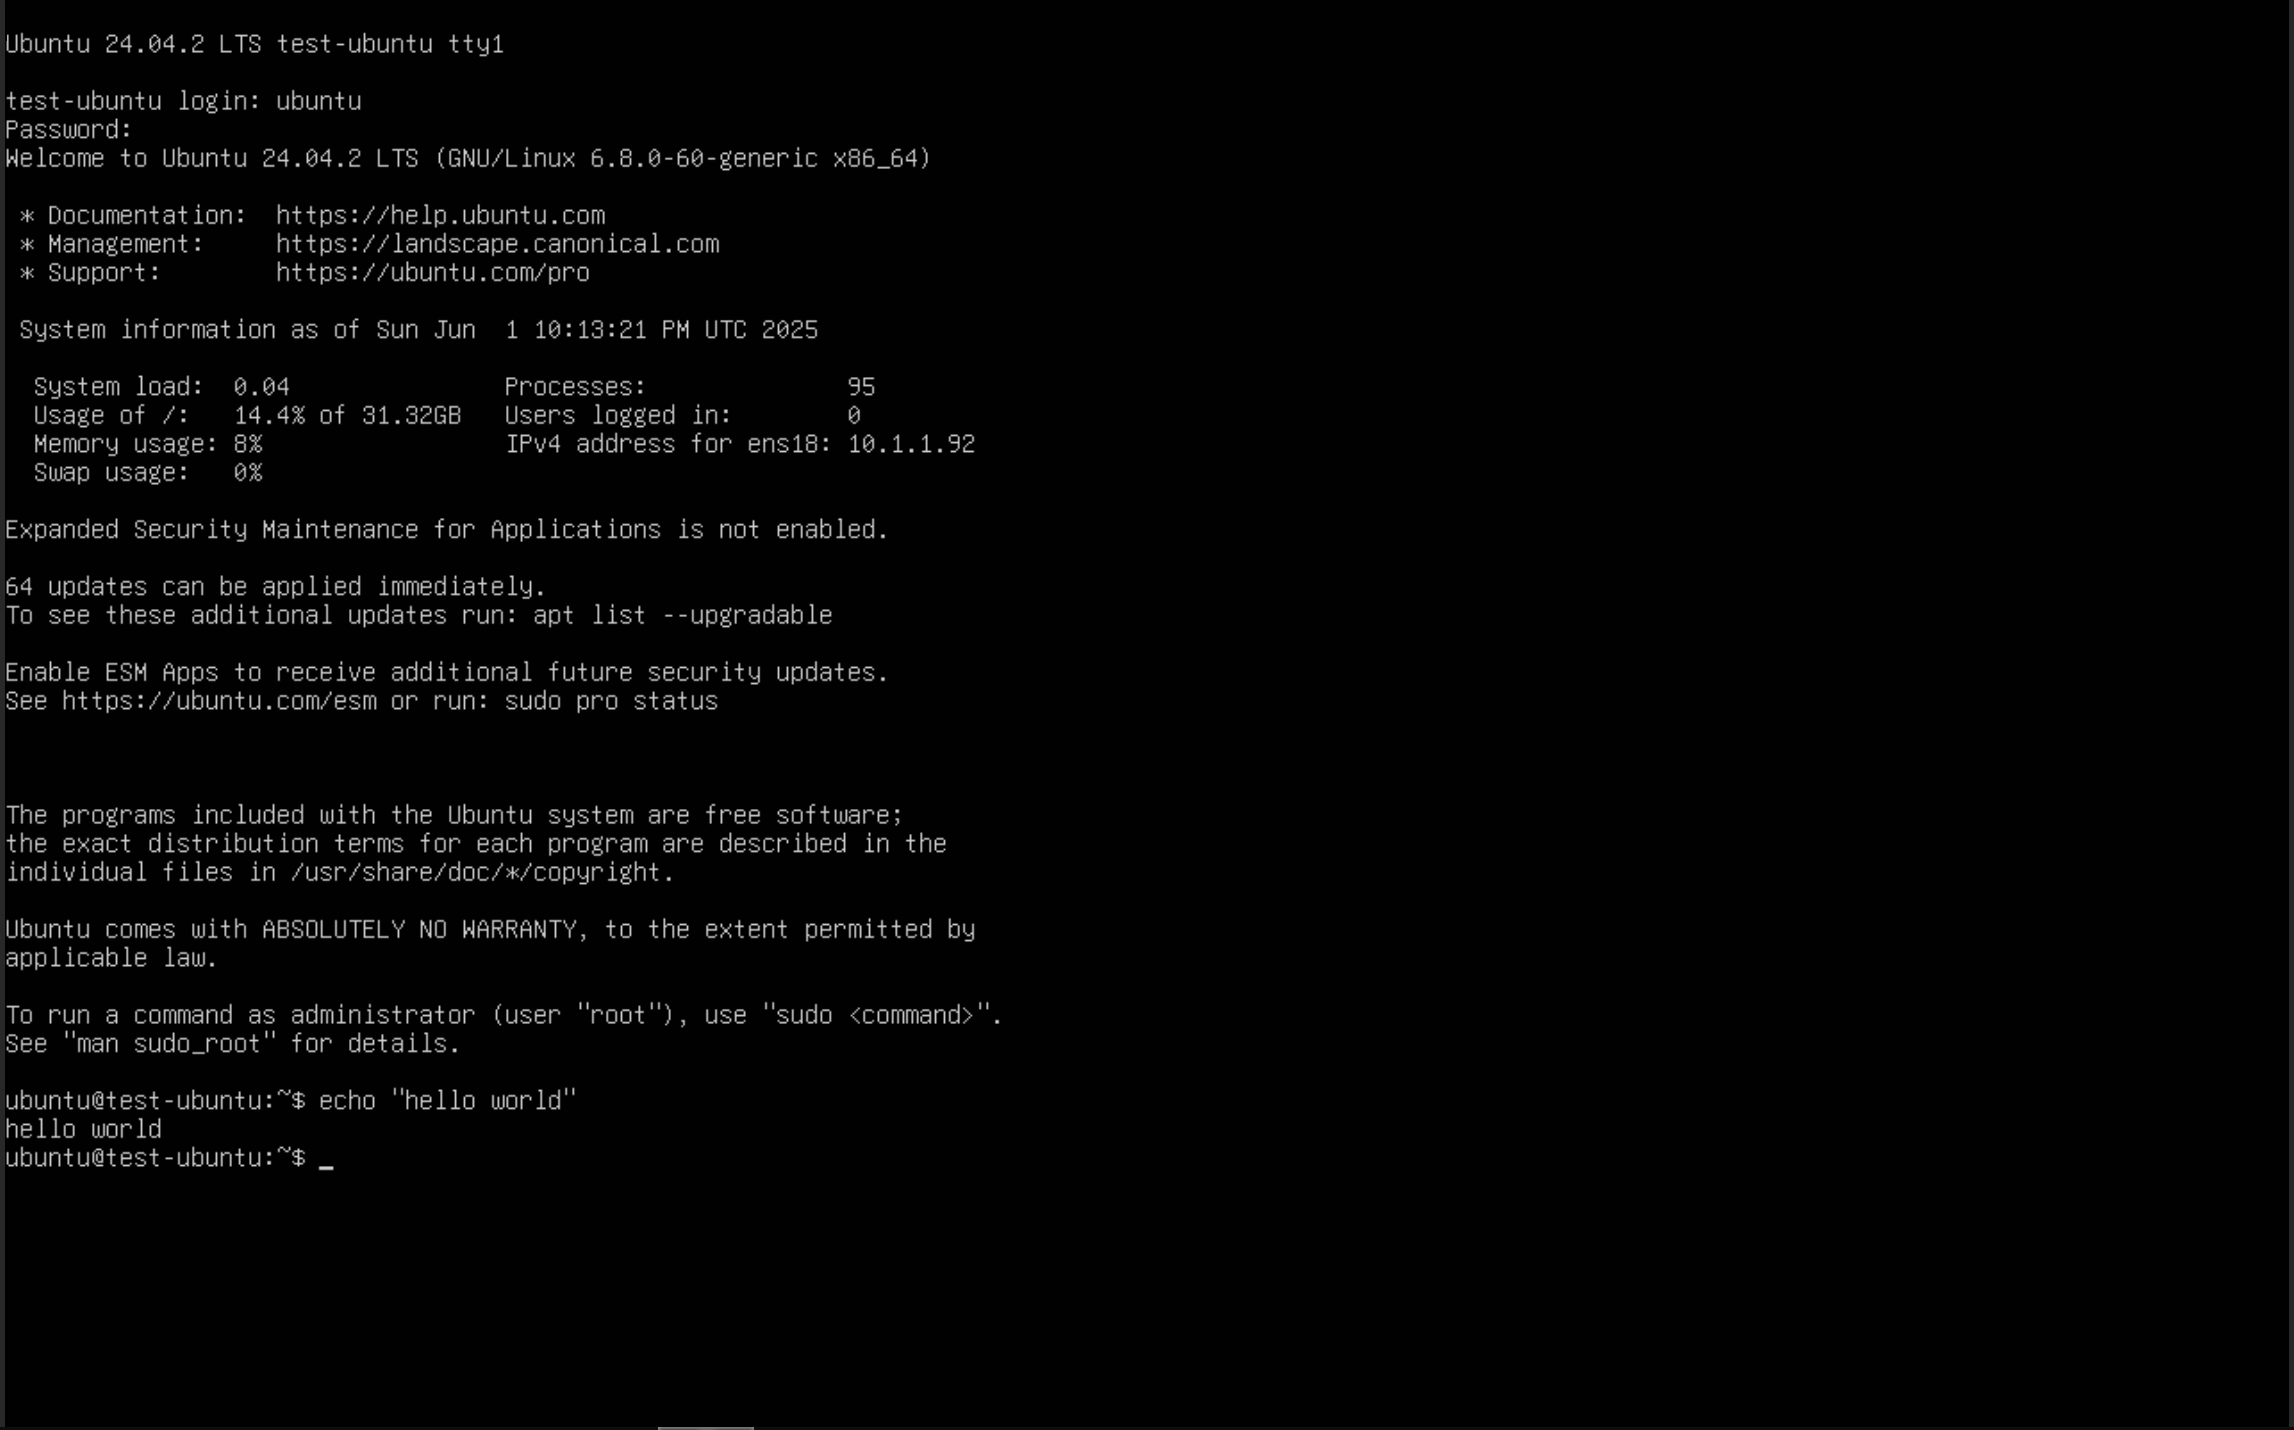
In the login field, enter ubuntu, and hit enter. Then enter the password you selected during installation.
Once you’ve logged in, you’ll be dropped into a bash terminal. You can enter a simple command here such as echo "hello world" to print hello world to your screen:
Congratulations! You’ve now created your first virtual machine!
Up Next
Now that you’ve created your first virtual machine manually, you can see how much easier it is to create a virtual machine than setting up a physical system, including cabling, power, storage, etc. However, you probably also can see how tedious it would be to create 5 or 50 of these VMs, especially if they’re nearly identical with only small differences.
That’s what we’ll cover in the next part: creating virtual machines from a template using Terraform.